Lentil Meatballs & Veggies in Spicy Coconut Curry

Wow.  This fierce cold weather feels like the coldest, eyelash blistering cold I have ever experienced.  And they’re threatening tomorrow will be worse.  Doesn’t that mean I don’t have to leave my house? No?!? Ah well in that case I need to make something to eat while I’m at school that I know will warm me up.  Lately it’s been all things lentil meatballs well because I love real meatballs but I don’t love eating meat right now.  Oh and I prefer doing little to no work- enter this recipe and why you will love it once you try it.

stew 2Plus when you make your own “meatballs” you can hide things in them, like vegetables 😉

This looks like a lot of work but it is truly very easy and so worth it so get to it!

Ingredients for Meatballs:

***if you don’t have all these ingredients just find a good curry powder you like

1 cup lentils (I used yellow & brown), (soaked for minimum 6 hours)

1 cup vegetable stock

1 10oz package mushrooms

1-2tbsp coconut oil

1/2 zucchini

1 onion

3 garlic cloves

1 tsp turmeric

1 tsp cumin

1 tbsp curry powder

1 tsp chili powder

1 tsp ground ginger

1 tsp ground coriander

few dashes dried basil and oregano

2 tsp worchestire sauce IF you want to have more meaty flavor

1/2 cup gluten free rolled oats

1 egg

up to 1/4 cup quinoa flour (or other flour to help bind)

*optional 2 tbsp tamarind for sweetness or 1 tbsp honey

meat2

Directions:

-Rinse lentils well and add to pot with 1 cup vegetable stock.  Bring to boil, then simmer with lid on till all liquid is gone.

-Meanwhile, pulse the mushrooms in a food processor and then add to bowl.  Pulse zucchini, garlic & onion and don’t overfill your food processor and make more work for yourself.  I find it’s easier just to do them one at a time.

-Add onions to large pot on medium-high heat and add all the spices.  Saute for 3-5 minutes till soften.

-Add garlic and saute for 2 minutes, careful not to burn.

-Add all the vegetables and saute until softened. Season to your taste and adjust spices as needed.

-Remove from heat and once cooled slightly add egg, lentils, flour & oats.  Your consistency may have more or less water so add the oats and flour in smaller amounts as needed. You can lightly mash half the lentils to help bind also, or do quick spin in food processor.

-Preheat oven to 350 degrees, use 1/8 cup measuring cup and kitchen gloves to roll meatballs. Should make at least 12. Bake until brown all over about 30 minutes. Flip after 15 minutes.

Ingredients in Coconut Curry:

1 onion, chopped

2 yellow & 2 red bell peppers, chopped

1 cup chopped carrots

3 garlic cloves, minced (use the food processor!!)

2 tsp grated fresh ginger

1 tbsp curry powder

1 tsp turmeric

1 tsp chili powder

1 tsp cumin

1 28oz can crushed tomatoes

1 can lite coconut milk (or full fat if you prefer)

1/2 cup vegetable stock

fresh chopped cilantro to taste

*optional red pepper flakes

Directions:

-Over medium-high heat, add 1 tbsp coconut oil to same large pot you used for meatballs & add onion.

-Add all your spices. You should be tasting as you go and adjust as needed.

-Add bell peppers & carrots, stir to coat.

-Add garlic & ginger, stir for 2 minutes.

-Add can tomatoes, coconut milk & veggie stock. Bring to boil and reduce with the lid off for 10-15 minutes.

-Season to taste.  Take your meatballs and crumble into curry and garnish with cilantro.

bite

Super Power Hot Chocolate

This hot chocolate has super powers like immune boosting, blood sugar balancing, packed with omega 3’s to make you even more beautiful, antioxidants & flavonoids just to mention a few.20130119-145703.jpg

Needless to say I am an obvious health advocate and also shamelessly obsessed with Dr. Oz. Now I don’t live and breathe by everything he says but I do like watching his show to see if I can learn something new. The other day he had on Sanjay Gupta who I never knew he was a neurologist and shared one of his treats he has at the end of the day. He made a “milk” drink & warmed it up with a dash of turmeric, ginger and cinnamon which I thought was pretty interesting and surprised I hadn’t tried this yet considering I put those ingredients in everything. So today I had to try it but made it into a “secret” hot chocolate and I also added a few other of my favorite ingredients. Shockingly, it was good. Really good, and you don’t taste the turmeric or ginger like you would think.

Doesn’t this look like a heart? Maybe it’s saying something… 😉

heart

Especially with all this “flu epidemic” going on I up the ante on my regular routine because personally I’m not a flu shot fan. So for a little extra nourishment, try this hot chocolate, it’s really comforting and delicious.

A teaspoon of turmeric helps the medicine go down! 😉

Ingredients

1 cup hemp milk ( or almond, coconut…)

1/2 tsp turmeric, cinnamon, ginger

dash cardamom

1 tbsp cocoa powder & dark cocoa powder

1 tsp maca powder

*optional 1/2 tsp matcha green tea powder

1 tsp vanilla extract

stevia to taste

Warm up on stove top or in the microwave. Top with a smidge of coconut cream for a little extra indulgence!

20130119-145653.jpg

Jalapeño Black Bean & Coconut Spread

ll

I don’t know about you, but my holiday break has already flown by. Back to the grind on Monday which means now I am trying to plan for the ciaos with easy go to meals that are healthy and delcious.  And although I’m a huge fan of trader joes and all those wonderful dips and spreads they sell, I know that I can make them myself with just a little effort.  Typically I love traditional hummus but I know that tahini is a bit expensive and due to my moderate allergy 😦 I used light coconut milk to help smooth it out instead which worked great.  If you are looking for more coconut flavor I would suggest using full fat because it is rather undetectable in the finished result. Fortunately, I am really pleased with how this turned out and I plan to double or triple the recipe so it lasts at least a week 😉

And for us gluten freers (seems to be growing by the minute) I suggest buying brown rice tortilla’s and baking them- it turned out perfect!  This came together so fast it would be great for last minute guests, lunch or just a snack.  So grab your food processor and give this a whirl 😉

good

Ingredients:

1 can black beans rinsed

1/3 cup light coconut milk (from the can)

2 jalapenos

2 cloves garlic

2 tsp ground cumin

2 tsp chili powder

1 tsp paprika

1-2 tbsp olive oil, or flavorless

2 tbsp minced fresh cilantro

Salt & pepper to taste

*optional, 1 tsp cayenne

Directions

-If baking tortilla chips, preheat oven to 375, coat in light oil and sprinkle with chili powder.  Bake 10-15 minutes.

-Wrap garlic and 1 jalapeno in tin foil and add to baking sheet with tortilla chips. If your not baking chips I would suggest doing a quick saute with the garlic and 1 jalapeno so it is not too strong.

-Once they’re both cooked, add to food processor and do a rough chop.

-Deseed your raw jalapeno & add the rest of the ingredients.  Puree & season to taste.

black bean 012

My Favorite Natural Beauty Products

So today were not talking food but rather some of my new found favorite all natural beauty products. I know most of those who read my blog are health conscious and watch that you eat fairly “clean”.  But I think most people don’t realize that what we put on our skin can affect your health. So over the past few months as my diet has changed to a more eco-conscious & “organic” direction, I have also began gradually looking at other parts of my life that could use a fresh green coat of paint.  Although I’ve never been one to go to salons (maybe 4 times) I do like to take care of my skin and play around with different makeup.  What I hadn’t wanted to acknowledge is real is the fact that the majority of products out there have lots of icky things like formaldehyde, toulene, parabens, phthalates, sulfates…etc.  What are all these your asking? Well obviously chemicals but they have been documented to change our cells and shown to be toxic.  {Find very detailed info here}

Now you might be thinking, yes but I would have to be putting tons of it on to have a negative impact.  Well the truth is women can put up to 25 different prodcuts on their skin not including things like hand soap and drinking out of plastics which also have the same compounds.  These can really add up and actually accumulate in our cells which studies have linked to the rise in breast cancer among other things.

So although I am not willing to give up cleaning my bathroom with bleach, I am definitly willing to use natural cosmetics on my skin which are then absorbed and can enter the bloodstream.  So I thought I would share with you some great and fairly affordable items I have fallen in love with. {You can click on the pictures for the source, but there are websites which have them for cheaper ;)}

1. Night Cream Argan Stem Cell and Chlorella Growth Factor by Acure Organics $17

This cream is so rich and hydrating and I noticed a difference in my skin within a few days. There was an overall improvement in the texture of my skin and it reduces the inflammation of the occasionally pimple.  I love that it uses chlorella and stem cell to help boost our skins natural growth. Plus a little goes a long way so the small bottle can last awhile.

 2. Green ApGreen Apple Nutrient Eye Creample Nutrient Eye Cream by Alicia Silverstone’s line “Juice Beauty” $30

This product has a practically perfect ingredients list and is the perfect consistency that blends easily. It has a subtle lightening effect and is very hydrating. Anti-aging effects from DMAE, CoQ10 & Green Tea.  It is a pretty affordable in comparison to other eye creams & I am expecting it to last at least a month. You only need 1/2 pump for both eyes.

3. Alicia Silverstone’s Irrestible Glow Facial Highliter $18Irresistible Glow Facial Highlighter

Again another completely natural list of ingredients and affordable considering how little you need to apply. This does take a bit of practice, but is totally worth it. The color is very flattering and is easy to adjust the amount.  You only need a few dabs on each cheek so I’m guessing this will last several months before it runs out.

4. MyChelle Dermaceuticals Sun Shield SPF 28 Coconut $15

mycele

This smells great and is not heavy at all.  I plan to wear this throughout winter, but in the spring and summer months I will be wearing a higher SPF when spending a long time outside.  Just to clarify, a lotion with higher SPF does not mean you don’t need to reapply and it last hours and hours.  It’s recomended that you should reapply every two hours unless your swimming and then it is even more frequent.

5. Kiss My Face Olive Oil & Aloe Moisturizer $8

Once I tried this I realized moisturizers I’ve been using were actually drying out my hands.  I wash my hands frequently so I can need a lot of lotion.  This sinks right in and is non-greasy.  You don’t need to reapply and it really results in softer hands.  The smell is very light and pleasant.

6. Zoya Nail Polish $8

Nail polish can be especially toxic and you would never expect that it could effect your health because it’s just your nails and not your skin.  Unfortunately our nails are part of our skin and still absorb toxins we put on them.  An especially dangerous chemical to look out for is toulene which is a known carcinogen.  Zoya is “3 free” of the most harmful chemicals and the first that I’ve tried.  I’m very pleased wNail Polish-Bela Lgith it {this is the exact color I used called Bela}.

This painted on just like regular nail polish and the color is really nice. I only did 2 coats and they came out perfect.  It is only been 2 days and it hasn’t chipped yet which has always been a problem for me in the past. {I used CND sticky coat which is also 3 free & plan to buy the top coat}


And of course I just can’t help myself and have to mention food.  Some of the most “beautifying” foods are those high in water content and especially vitamin A & C like watermelon, lemons, cucumber, eggplant & avocado.  I hope this helps and let me know if you have any favorites worth trying! 🙂


New Year, New Granola Bars

Happy New Year to everyone!  Hope you all had a great 2012, I know I did!  New apartment, new school, new blog, new job, quit new job, lots of new recipes & my most favorite part is the shiny little something sitting pretty on my finger 🙂 .  Now how is 2013 going to top that?  I’m not sure but I do know I’m starting with a new granola bar recipe.

Close up

I much prefer a chewy, denser granola bar minus the sugar, soy and other strange ingredients that comes in most store bought. Oh and gluten free at a non-gluten free price. So after you try scouring the stores for something fitting this description you can come back here and make these because they are good and healthy. I plan to only eat one once they come out of the oven and put the rest in the freezer for crazy school days which are approaching fast.

Oh & how cute is this jar of honey?  The only added sweetness is 1 tbsp honey drizzled over the bars when they are finished baking.

Granola Bars 003

Now although I quit counting calories, carbs and all other things numbers a long time ago, when it comes to bars I always read the ingredients list and make sure it’s not just like eating a candy bar.  So I have provided the “counts” below, but really if you eat healthy & understand what a portion size is I encourage you to not rigorously count & make yourself crazy, it’s quite liberating.  And while I’m sure many of you have wonderful health resolutions, try to  focus on the fact that you can have an abundance of fruits and vegetables without consequences.

Granola Bars 002

Original recipe by Kathy.

Ingredients:

-1.5 cups GF rolled oats

– 2 tbsp sunflower seeds

– 1/4 cup pumpkin seeds

– 2 tbsp chia seeds

– 3 tbsp cacao nibs

– 1/4 cup mixture walnuts and pecans

– 1 egg

– 1 & 1/4 cup unsweetened almond milk

– 1 tbsp cinnamon (yes 1 tbsp)

– 1 tsp vanilla extract

– 1 tbsp coconut oil, melted

*optional, drizzle 1 tbsp honey when pull out of the oven

(I prefer no fruit to avoid too much food combining and blood sugar spikes.)

Directions:

-Preheat oven to 350, mix dry and wet separate, combine, bake 30-40 minutes, & eat!

bar

Makes 9 Servings

Calories: 161

Fat: 3.2g Saturated, 3.1g PUFA, 1.4g MUFA

Carbs: 12.9g

Fiber: 4g

Sugar: 0.8g

Protein: 5g

These bars are high in manganese, vitamin E, copper & magnesium with smaller amounts of zinc, iron & calcium. These minerals work to boost your thyroid, immunity, stabalize blood sugar, red blood cell production and the list goes on & on. So grab a bowl and start mixing to fuel up for the new year!

Ginger Snaps & a Diamond Ring!

sparkle

So yes indeed it has been awhile since I’ve made an appearance.  For the record I have about 5 posts in draft right now and it is really just a matter of I am not proud of my photography so my motivation to post is lacking.  In the meantime, finals have come and gone, I survived and oh yeah, just got engaged! 🙂 Was a surprise needless to say, I thought it would happen on our 5 year anniversary in February but tada it happened last night! I absolutely love the ring, he did an amazing job picking it out.  It sparkles so much I can’t stop looking at it.

Actually the only time I have stopped looking it at is when I baked and then ate 3, 4, ok 5 of these ginger snaps.  No, unfortunately they are not healthy, they are not gluten free or dairy free, they are you regular run of the mill holiday cookies which is actually a gift for my step-father. All 35, 30 of them 😉

ginger cookieThis is my first time making ginger snaps and they turned out great! So easy to make and the perfect amount of sweet, spice and crisp!  I used this recipe and the only thing I did differently was use 2 tbsp ground ginger because my step-dad really loves a strong ginger flavor although I still did not find it overpowering.  I also rolled them in sugar & ground ginger before baking to really make sure he knew they are ginger cookies.  To make sure they have their snap cookie them at least 10 minutes, but as always when making cookies they burn fast so keep an eye.

I hope your holidays are going well and taste delicious!

Asian Buckwheat Soba Noodle & Chicken Bowl

Now who doesn’t love a gorgeous bowl of noodles doused in asian flavors with a bit of crunchy peanuts and grilled chicken?  Throw in some fresh, crisp vegetables and scallions and before you know it there’s an asian invasion inside your mouth.  Wow I am really on a roll lately with bad puns…

I found these noodles at this AMAZING gluten free store that is unfortunately 2 miles away from my house. I say that because it has an incredible selection which makes my eyes bulge and my money disappear.  The appeal of packaged gluten free goodies is often too tempting and I opt not to indulge but some hearty gluten free pasta can be a girls best friend when in a pinch.  Fortunately for the BF though because this was an on the fly meal for him, which he gobbled up faster than I could clean the kitchen.

The saddest part though is that I made this months ago, like maybe in June?? :/ I took the pictures and then left them to hang out on my phone till tonight when I was cleaning through the clutter and all the 1,000’s of apps I have & don’t use.

This is your fairly classic combination of asian flavors and as always make to order for your own taste buds!

Ingredients:

1 serving buckwheat soba noodles (always check for GF if needed. Soba does not guarantee it is GF)

1 carrot julienned

1 serving pre-cooked chicken

2 scallions cleaned and sliced

1 tsp grated fresh ginger

1 clove garlic, minced

2 tbsp tamari

1 tbsp sesame oil

1 tsp oyster or fish sauce

1 tsp red chili flakes

1 tbsp rice wine vinegar

**flavorless or peanut oil to saute, or for lighter version use low sodium vegetable broth

Directions:

-Boil noodles according to directions.

-Mix sauce ingredients, tamari-vinegar.

-Add oil or veg broth to a deep skillet, bring to medium-high heat and add carrots, ginger, garlic.  Saute for 2-3 minutes until carrots soften.

-Add noodles with a bit of pasta water if needed and mix together.  Add your chicken & sauce ingredients & mix till everything is coated and warmed up.

-Remove from heat and add scallions and 1 tbsp crushed peanuts or sesame seeds if allergic to peanuts.

Put in your favorite bowl and eat up!

Ramen Remix

Another Thanksgiving has come and gone.  I hope yours was as good as mine.  Taking two days off from papers, studying and all things responsibility was the perfect way to recharge for the last leg of the semester.  Oh and I made my first pie.  Which was also my first gluten-free pie.  Pie crust- intimidating enough not to mention the no gluten part.  And of course I’m going to keep that a secret until after everyone has eaten and enjoyed it.  Thank goodness for King Arthur flour.


Luckily this was a success and a pie to make Paula Deen proud.  Pecan Pumpkin Pie infused with blackstrap molasses rum.  Although if I had came up with the original recipe I would probably call it Butter and Brown sugar pie with a smidge of pumpkin. Since it was Thanksgiving though I don’t feel guilty about eating a weeks worth of saturated fat.  Plus the bf really wanted pecan pie so this was my compromise.  I got the recipe here.

20121124-192044.jpgI may have had a bit for breakfast today. Pumpkin and pecans are superfoods after all 😉


Switching gears to something a little less artery clogging – my take on one of my old favorite staples, Ramen noodles.  I am even feeling ballsy enough to call this Detox Ramen Noodles since it’s filled with veggies, natural broth and miso.  Sounds pretty contradictoy right?  Well the original is a serious health offender and if you are brave I dare you to check out the video of ramen digestion.  It’s out there- and it’s scary.

20121124-192054.jpgI won’t get into the descriptives of the video but I will talk about how easy and delicious this was.  Plus it is still just as comforting and doesn’t give you an MSG hangover.  Especially with the temperatures dropping it has me craving warm and nourishing meals that I can make quickly.  This has become my new favorite go to for chilly nights and no time to cook.

20121124-192103.jpgFor the noodle sub in I used kelp noodles which I would probably eat everyday if they weren’t a tad costly.  They serve a really similar texture to ramen and if you prefer them softer just add them to the broth sooner.  I like them with texture so I add them once I take this off the heat.  This dish is really simple and versatile so feel free to use your favorite vegetables.

Ingredients:

1/2-1 cup vegetable broth (low sodium, gluten free)

1/2 small onion

1 or 2 garlic cloves (I may have used 5. Yes I have a problem)

handful carrots chopped

2 celery stalks chopped

2 handfuls baby kale or other green veg

1/4 cup sliced bella mushrooms

1 tbsp minced ginger, or to taste

1 tbsp miso paste

Dried herbs (I use herbamare)

Directions:

-Warm broth in deep skillet.  Add onions, carrots, celery and saute till slightly softened.

-Add garlic, ginger, mushrooms & any seasonings.  Saute 2-3 minutes.

-Add green vegetable (baby kale cooks quickly like spinach thats why I added it last.  If you have regular kale it will take longer to cook and should be added with mushrooms.) Add noodles now for softer texture- or

-Take off heat and stir noodles into soup.  Add to your bowl and wait until it is cool enough to eat and then add miso paste.  If you add it to the pan it will kill the healthy bacteria and no longer have good probiotics.

Enough your health boosting Ramen!

Raw Honey Holiday Nuts

I know what you’re thinking. I’ve been MIA for two weeks and I present you with a dehyrated nut recipe? With pretty much one ingredient- named honey in the raw. Well I’ve been up to my ears in test and deadlines so you will just have to manage. Besides these are a holiday favorite.

20121118-215747.jpg

Thanksgiving is almost here which means lots of school deadlines are fast approaching as well as recipe overload. This is the first year in maybe 7+ years that I’ve had off of work and although I’m excited to finally get to cook for thanksgiving (I know I’m excited but it’s because I don’t have any onbligation to make things- and it won’t be at my place) and I literally cannot decide what to make. It’s so overwhelming the amount of amazing looking delicious recipes that I am about to just randomly choose some.

20121118-214337.jpg

One recipe that I was able to commit to was honey sweetened nuts.  Who doesn’t love such a sticky, sweet treat that is perfectly healthy in moderation.

  So if you’re like me and don’t know where to start for the thanksgiving feast, make this to nibble on as your scrolling/flipping/scavenging for recipes.

Ingredients:

Really? You’re not sure? I’ll assume you’ve already tapped into the eggnog 😉

However much nuts you want to have on hand.  I did 1 pound walnuts, almonds and 12oz pecans.  Soak them all separetly if you have a dehyrator (this makes them easier to digest and more nutrients available)

Each time varies and sources vary as well.  I do almonds for 24 hours, pecans and walnuts about 12, maybe more.

Always use filtered room temperature water.  Some sources say use acid, I didn’t this time.  I did add 1 tsp himalayan salt to each.

Dehydrate under 118 degrees to keep raw and enzymes alive.  Time varies, expect at least 12 hours.

After 6 hours or until no moisture appears on the outside, put your nuts in a bowl with some honey.  Yup, pretty difficult stuff here.  Optional add ins- sea salt, cinnamon, coconut sugar, all spice…etc. Continue to dehydrate until crisp and dry when you bite into almonds. They hold the most moisture.

 I store in mason jars and not in the fridge because my apartment doesn’t get too warm this time of year.

Sweet & Spicy Greek Turkey Meatballs

Before I talk about food I have to acknowledge the significance of the storm Sandy and send my thoughts and prayers to everyone affected.  Living in NJ it is especially shocking to just see the incomprehensible amount of damage, losses and lives changed forever- in places that are only miles away.  I feel almost ignorant speaking about this in the comfort of my heated apartment with all modern day conveniences available but I hope during a school break to make time to volunteer for those whom have lost everything.  If you are looking to lend a hand here’s a link How to Help

Now switching gears a bit, a meatball recipe not originally mine but Giada’s that I have been eyeing for a while now.  Her show is one of my selected TiVO series and although they are all re-reruns right now I enjoy watching her because she makes everything look so easy.  Luckily these meatballs were really easy to make and so freaking delicious.  I made some changes by using lean turkey (although I do like lamb 🙂 ) reducing the cinnamon and using gluten-free breadcrumbs instead of couscous. Therefore my result was much denser than hers but we didn’t mind it.

I was weary about all the cinnamon and didn’t want this to turn out badly so I only used 1 cinnamon stick and used 1 tbsp cinnamon in meatball mixture and probably 1/2 tbsp ground cinnamon mixed in with the sauce.  I also used fresh mint instead of dried and next time I might add some more fresh herbs to the sauce since I love fresh herbs.  And yes, they were boyfriend approved.

20121103-121857.jpgI had mine over raw zucchini noodles and boyfriend had his over whole wheat penne. As you can see I like my meatball:sauce ratio about 1:1/4 cup.  I thank the acid reflux angels that were with me when I scarfed this down because I was not going to leave anything in my bowl no matter what. (I sometimes suffer from it when using too much lemon, coffee, eating late at night…etc.)  Even the thought of not sleeping because there is a fire-breathing dragon in my esophagus did not stop me.  Thank you angels.

I can’t wait to throw these puppies on a gluten-free roll with some Daiya mozzarella and piles of sauce.  I plan to also make a vegan mushroom based version of these in the future which I know will be amazing and will keep you posted. 🙂

20121103-121929.jpgGo here for Giada’s recipe

Purple Cauliflower, Carrot & Two Lentil Curry

Some cosmetic changes here- what do you think?  I think I’m pretty content with it considering my severely limited technical skills.  I’m not even going to tell you how much time I spent on it.  I guess I have “Sandy” to thank for this. Or “Frankenstorm” or whatever they’re calling this wicked rain for the next 5 days?!? I hope everyone is in a safe and dry place.  Do I really need to fill my bathtub with water??

I am loving all things lentils right now.  I feel like I need to make up for lost times we should have had together.  So I will do my best not to put up 100 lentil recipes in the next month but I can’t promise anything.  I am the type of person that when I find a new ingredient or a forgotten favorite, I eat it relentlessly until I get sick of it.

I’m loving lots of cauliflower lately too.  It’s such a modest vegetable with its white, lackluster appearance you would never know it is a “superfood”.  Packed with nutrients, fiber and oh this lovely purple variety has anthocyanins which are scientifically proven to eat up cancer cells.  Who doesn’t love that?

So if you’re a regular visitor of my blog you know I’m a huge Indian food fan.  I have spiced up my eggs, sandwiches, and desserts with Indian spices like ginger, cumin, coriander and the latest favorite is fenugreek seeds.  I have mentioned them once before since they are filled with lots of health benefits you would never suspect.  Some health benefits in just 1 tbsp is they have 20% RDA of iron, 3 grams protein, 3 grams of fiber, and trace amounts of copper, calcium, zincmanganese and magnesium.  They have also been used medicinally for hundreds of years to improve those lovely female symptoms, as well as digestive troubles.  It has been clinically proven to help with insulin sensitivity and to have cardiovascular benefits.  So with the endless list of health benefits I have begun to add 1 tsp of seeds to my smoothies in addition to the regulars like turmeric, occasionally red maca powder and matcha green tea powder {typically not all together} With all the other ingredients you can’t even taste in a smoothie but be sure you have a good blender because you wouldn’t wanna chomp down on these tough little seeds.  Alternatively, you could grind to a powder first and then add.

But I digress from this lovely, very easy curry which I made to have ready for lunches or dinners.  It’s what you might call a “one pot wonder”.  Curries may seem quite intimidating with the sometimes lengthy list of ingredients and foreign spices, but it really is such an easy dish to make.  Plus then if you are not a huge spice or heat fan, you can lessen the amounts to suit your taste.  I definitely encourage you to dabble in Indian cuisine if you have not yet tried, it can be extremely healthy and comforting without much skill required.  Did I mention crazy delicious?!? Plus curries are so versatile you can make it with practically any seasonal vegetables.  I used carrots and cauliflower but feel free to use some of your favorites!

To prepare lentils:

1/2 cup red lentils, soaked at least 8 hours

1/2 cup green lentils, soaked min 8 hours

1.5 cups vegetable broth

small handful curry leaves

Directions:   {red lentils cook faster than green lentils, so if you need the “perfect” texture keep them separated from soaking to cooking.  I don’t mind and didn’t notice that one was more/less cooked than the other.}

Rinse them in a colander and check for stones or debris.

Soak them for at least 8 hours in filtered water- {this is not required but I soak all nuts, beans, seeds and grains to reduce phytic acid and make easier to digest}

Rinse again in a colander till water runs clear.

Put 1.5 cups vegetable stock in large pot and bring to boil.  Add lentils and reduce to medium simmer with lid on.  Check and stir.  You may need to add more broth depending on how you like your lentils.

When all the liquid is gone, add curry leaves and pour into a small bowl, set aside.

Ingredients for Curry:

1 tbsp extra virgin coconut oil

1 tbsp butter or ghee

1 tbsp fenugreek seeds

1/2 sweet onion chopped

1-2 cups baby carrots chopped roughly

2 tsp curry powder

1 tsp turmeric

1 tsp ground coriander

1 tsp cumin

2 tsp red chili powder

3 garlic cloves

1- 1 inch piece ginger minced or grated

1/2 can tomato paste

1 head cauliflower, purple or regular chopped

1/2- 1 cup vegetable stock

Directions:

 Use large pot and add coconut oil, butter or ghee.  Add fenugreek seeds and once fragrant add chopped onion and carrot, saute for 3 minutes.

Add dry spices and stir well to coat.

Add cauliflower, garlic, ginger, tomato paste, and vegetable stock.  Stir everything well and put lid on with medium simmer.  Check in 10 minutes for the cauliflower to be fork tender.  Taste and season as you like.

You could add fresh cilantro but I didn’t want it to overpower the curry leaves so I left it out.  You could also make it richer with canned coconut milk which is always delicious.


Now all I need is some fresh naan…yummm.

Dark Chocolate Pancakes Topped with Cinnamon Apple & Almond Butter

Yes, Dark Chocolate HEALTHY Gluten Free Pancakes. And as you can tell by the title, the fun doesn’t end there. Slices of cinnamon dusted apple & roasted almond butter. For dinner.

Oh and do yourself a favor and leave your guilt at the door– because this is barely 300 calories. Scouts Honor.

Unfortunately I am not the genius who came up with this recipe- Katie is. I snagged from her Brownie Batter Pancakes which I have made many times, but this time I used buckwheat flour. (I’ll just tell you there is a reason she doesn’t use buckwheat flour for desserts…but I really like buckwheat and I needed to use it up).

I have been craving chocolate like my life depends on it lately and I generally don’t get strong cravings for things. So I had thought earlier today that I will satisfy my craving and find a 70%ish chocolate bar with minimal sugar to eat as a meal. That’s a perfectly good rationale right?

Chocolate really does have considerable health benefits consisting of antioxidants, ability to lower heart disease risk by increasing blood flow and increases your happy hormones 🙂 Luckily I did not impulsively dive for the first chocolate bar and went on through my day because I decided I didn’t want to start on a sugar spiral. Boy am I glad I did because this was WAY better than a chocolate bar. Plus, no sugar crash, no guilt, just a big happy grin at the end of my day. Oh yes, this was my dinner- and I’m not gonna lie I think it might happen again tomorrow.

I used Katie’s ratios for making the pancakes but I use

1/4 cup buckwheat flour

5 tbsp almond milk

1 tsp baking powder

1 tsp vanilla extract

1 secret tsp matcha green tea powder {it’s a secret from your taste buds ;)}

1 packet stevia

4-5 drops vanilla stevia

Then I just fry them up in a smidge of coconut oil as about 5 small or (you can do 2 large). If you stop there with the recipe it’s only about 130 calories. But why would you stop there?

In the past I have used her banana peanut butter to top these off but I am obsessed with all things apples lately- literally have to eat 1 everyday.

Oh and I’m really sorry if this is your first time hearing about Katie’s blog. Not only because you have been missing out on some seriously delicious eats, but now you probably won’t sleep tonight because you are reading all of her posts. Don’t worry we’ve all been there.

Now it’s time to indulge in a sinful but not sabotaging dinn-ert 😉

Sprouted Lentil Loaf with Sweet Potato & Mushrooms, Vegan,GF

Say what? Lentils? Sprouted? Do I plant it?

I am guessing those who are new to lentils and sprouting are thinking some of those thoughts. Well, if lentils and sprouts are new to you, allow me to introduce you. Lentils are a seriously underestimated “superfood”. They are packed with protein, iron, b vitamins, fiber and lovely properties to help balance your blood sugar and lower cholestrol. Yeah I know, you have been missing out on a seriously healthy food. Plus it gets better. When you “sprout” things you can triple the amount of nutrients in them- without lifting a finger. No it’s not exactly magic, but just nature doing its thing.

You can sprout any seeds like sunflower or even quinoa as well as beans (not outta the can silly- gotta be uncooked) and lots of other things. All you have to do is soak the grain or seed overnight in filtered water, drain and rinse it well the next morning, and let it chill on the counter in a jar or mesh strainer. You can get a fancy sprouting jar but it’s not necessary if you have a strainer. Those lentils sprouted for I think 3 or 4 days, which just means every few hours I rinsed the lentils (which is especially why I like using mesh strainer) and just let it hang out on my counter in the strainer.

So when you are sprouting you are actually re-activating enzymes that had these “enzyme inhibitors” on them otherwise they would be sprouting all the time and go bad very quickly. That is another thing- when you sprout the amount will double in size and they only last about a week so make sure you are going to eat them!

So with all of these sprouts I thought I was going to do a sprouted lentil hummus but then I changed my mind and decided to try a lentil loaf. Which is kinda funny since last week I made a Spinach Turkey Meatloaf even though I didn’t show you guys 😉 Plus I just got lots of great produce like sweet potatoes, carrots and mushrooms so the decision was made! Oh and you know I’m going to tell you this was super easy right? And I don’t think I need to tell you how healthy carrots, sweet potatoes and mushrooms are…

This is the perfect lunch or dinner for the week and if you have a food processor you just made your life a whole lot easier. Oh and did I mention it’s boyfriend approved? Yes I was not even going to ask him to try it but he did- and then took another taste. And then asked if he could have some for lunch. And we know he is a mans man when it comes to all things “loaf” so I encourage you to try this on your picky men. And if you don’t want to put the tiniest bit of effort in and sprout your lentils then just cook them according to the package. There are lots of different kinds so make sure you follow the directions! 🙂

Ingredients:

(If you sprout, take 1 cup raw lentils and follow the sprouting directions– will make 2-3 cups)

**Ignore the broccoli in the photo above, it didn’t survive

2 cups sprouted or 2 cups cooked

1/2 sweet potato, grated

1 cup baby carrots or regular

1 white onion, chopped

3 garlic cloves

1 package preferred mushrooms, I use baby bella

1 tbsp butter or butter sub

1 tbsp olive oil

1/4 cup vegetable broth

1/4 cup cashews

soy sauce

Chili powder, cumin and coriander to taste

Directions:

-Preheat oven to 350, grab loaf pan and lightly spray with non-stick

-Chop mushrooms, carrots, garlic and cashews by placing in food processor and pulsing till roughly same size as the lentil. If its powerful enough do your sweet potato as well, but I grated mine by hand.

-To a large, deep skillet add butter, oil and veg broth to medium-high heat. Add white onion and saute for 2 minutes. Add all processed vegetables.

-Season well with salt and pepper. I also added chili powder, dash soy sauce, cumin and coriander but feel free to season as you wish. (I had wanted to use sage and thyme but I have neither right now.)

-Pulse your lentils to desired consistency, I did it till them were fairly broken up but not completely. Add them to the skillet and continue to taste and season. No perfect measurements with these things just do what taste good 🙂

-Press into loaf pan and cook in the oven for about 15 minutes. {I bet this would be great in muffin tin to make perfect portion size! I would double the batch and freeze the rest!}

– It will crisp the top but the inside will remain soft. If you want a crispier loaf, I suggest using day old bread as you would with bread pudding or how I make regular meatloafs using Stoufers Stuffing Mix. I would use half of the package and just mix it in at the end, you may need more liquid so add small amounts of vegetable broth. ( I can’t vouge for results though I haven’t tried this, just a suggestion)

* I wanted to keep mine gluten free so I didn’t use any bread or bread crumbs.

This would be a great vegan option for Thanksgiving!

I sliced about 7 large slices and have my lunch packed for the week now. Yummy and comforting vegan superfood! I am going to try a BBQ version of this soon so stay tuned! 🙂

I am thinking of making some mashed cauliflower to go with this.  Talk about a nutrient dense meal!

20121021-144756.jpg

20121021-144832.jpgI am loving fall right now, how about you?

Green and Glowing from the Inside-Out

So yes it’s been awhile since I posted.  But you can forgive me because last week was lots of midterms.  I’m still alive though, and cooking, and especially eating.

Plus I have a few new tricks up my sleeves and they don’t exactly involve eating but there is a recipe.  Actually you will be wearing it. If you want gorgeous, glowing and smooth skin.

It involves a little of this.

And this

and a little scrubby.

I have been doing this 1-2x week and it’s awesome! Literally it’s like having a seaweed spa facial but paying a fraction of the cost and getting immediate results.  A word of caution though, if you have never eaten spirulina or tried it on your face, make a very small amount of this and try on your hand or arm to make sure you don’t have an allergic reaction.  You may see some redness and it made my face itch slightly while I was wearing it for the first time but this is from the high amounts of Vitamin A that is removing those superficial layers of skin.  Another word of caution is this is slightly messing when rinsing off so if you are not doing this in the shower, make sure your not wearing or near anything that you can stain.

And absolutely wear sunscreen when you go outside.  Your skin becomes more vulnerable to sun damage because you are removing those top layers of skin and exposing the deeper layers.  Damaging these layers can cause more harm and aging so wear your sunscreen!

To Make Rejuvinating Spirulina Mask:

Mix 1/2 tbsp spirulina with a few dashes of olive oil and a pinch of your usual face cleanser OR 1 tsp sugar.  If this is your first time I suggest only wearing it for 5 minutes and work your way up to 15 adding 5 minutes each time.  I also recommend a splash of raw apple cider vinegar which can help remove any build up and has 100’s of wonderful uses and benefits.

Once time is up remove with water and if you use any type of toner or makeup removing cloths in order to remove everything.

You can use a pinch of your typical moisturizer, but to really reap the benefits, cover your face with avocado oil (not dripping) and before you go to bed just lightly pat excess so you don’t drench your pillow.  The vitamin E works to remove the redness the mask may have caused and is extremely anti-inflammatory for your face.

I only do the mask 1-2x week, but I am using the avocado oil every night and it is amazing.  It is healing any pimples I may have and picked (oops!) rapidly faster and the texture of my skin is much smoother.

Ok there is a recipe, I couldn’t help myself 😉

Now to really cure this skin problem from the inside out, I recommend the delicious Glowing Green Smoothie by Kimberly Synder.  I have become addicted to this and I know it sounds crazy putting cilantro in your smoothie but it is one of those don’t knock it till you try it. Picture from Kimberely’s Blog.

I have altered it a bit and I use

1 celery stick

1/2 an apple

2 cups spring mix or baby spinach

small handful cilantro

1/2 cup seedless cucumber

water to blend and ice

occasionally 1/2 frozen banana

I also add a few things to bump up the anti-inflammatory factor even more like 1 tsp turmeric, 1 tsp raw unpasterized and unfiltered apple cider vinegar and 1 tsp spirulina.  I occassionally also add wheat grass (not the liquid the real thing-yes it does taste awful so only use a little bit) matcha green tea powder and fun toppings like goji berries, honey bee pollen granules, hemp seeds, avocado, oat bran or granola of course. (Not all at once)

You can of course personalize and create your own green smoothie but I recommend trying the original first, it will surprise you how good it really is and how good you feel after.  Check out Kimberly’s Blog for all the health benefits plus lots of other great info!

Raw Sweet and Salty Mocha Almond Cacao Truffles

Quite a wordy title eh? Well I could probably use another 1000 different adjectives and it still wouldn’t do these truffles justice. If you are a chocolate, sweet, salty, coconut, nutty, chewy, crunchy, mocha, did I mention chocolate?- Lover, then you are at the right place because these are insanely good. And easy, which can mean trouble. So if I’m referring you to- slim down this recipe to 1 serving {1/4 cup almonds and figure out the rest} But if your like me and you are attempting to test your will power by putting these in the freezing and repeatedly saying I will only eat 2 at a time, then by all means start making these!!

20121006-123736.jpgI rarely ever make treats like these for myself because they can be very high in calories, fat, carb, and sugar dense. But awhile back I bought raw cacao beans because I wanted to make my own raw treats and actually try what real chocolate taste like. Let me do a favor and tell you- it is the most bitter taste ever. Just the smell can blow you out of the water after grinding the beans into powder. But there are some really great health benefits to real raw chocolate, which you have probably heard 1000 times. Or if your like me it is my justification to eating a lot of bitter chocolate. {covered in honey might I add :)}
 
Oh and I apologize, I cannot figure out why it won’t let me un-italicize, wordpress just doesn’t like me today- maybe because it can’t eat truffles…;)
 
Ingredients:
2 cups ground almonds
1 cup raw cacao powder
1/4 cup unrefined coconut oil
1/2 cup honey or agave
1/4 cup cold brewed coffee
3 dates
1/4 cup goji berries
 
Garnish:
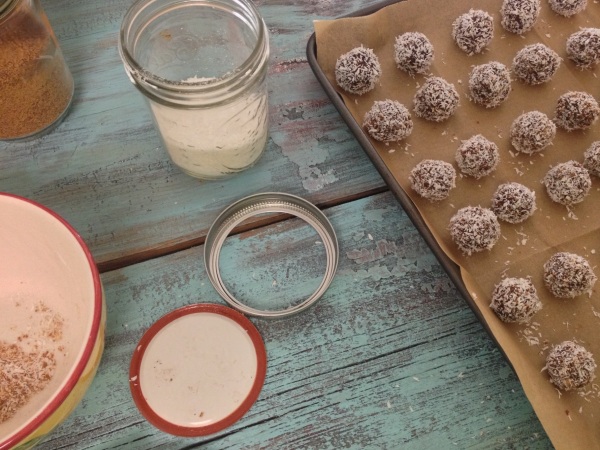
1/2 cup coconut flakes
2-3 tbsp coconut sugar
1 tsp himalayn sea salt
 
20121006-135701.jpg
 
Directions:
-Soak goji berries & dates in hot water for 10 minutes to soften
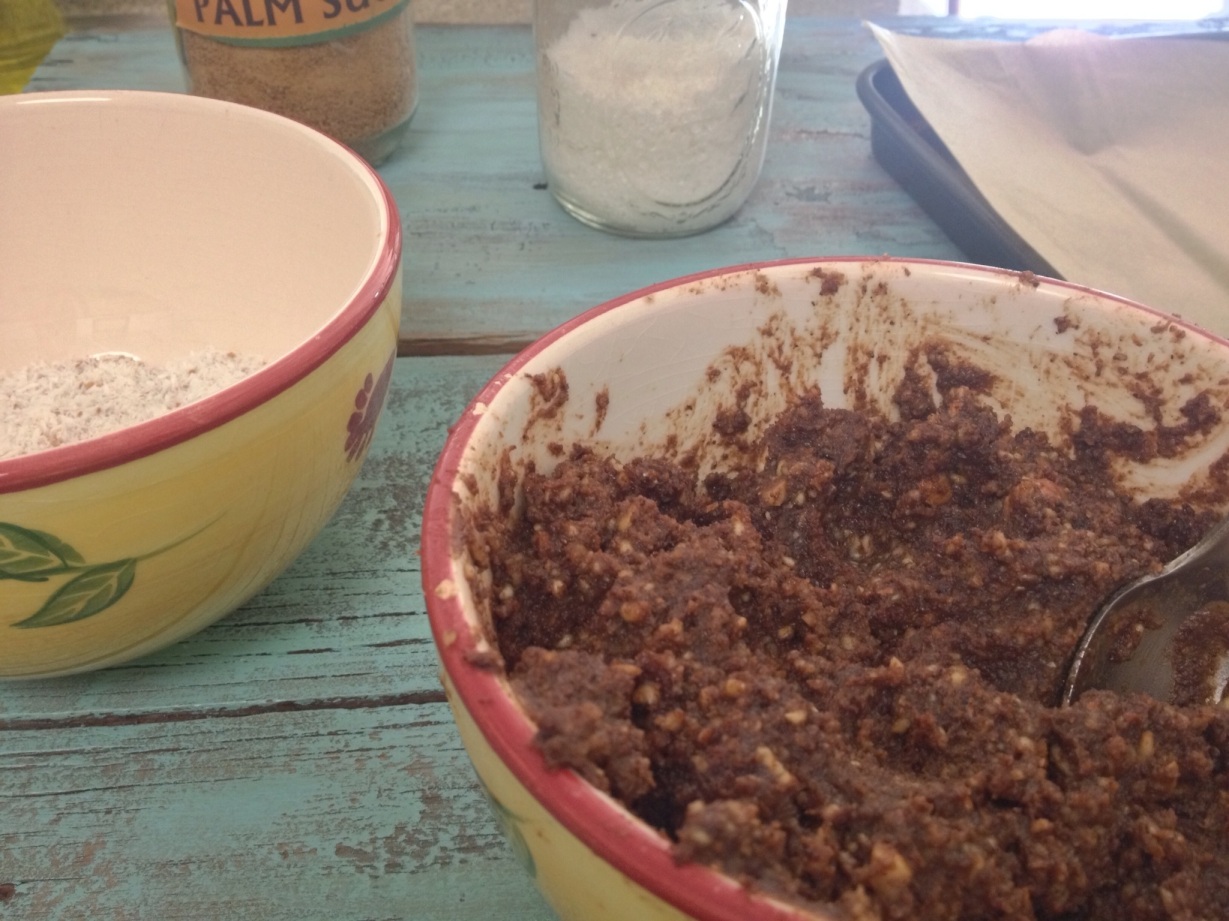
– Grind almonds in food processor if whole to almost meal-like course
-Add everything else & pulse together till you get a sticky, rollable consistency.
-Grab a cookie sheet & cover with parchment paper
-Grab a small bowl & stir together your garnish
 
20121006-135643.jpg
-Take 1 tbsp and roll into a ball with your hands (yes, it’s a messy and delicious job) and then roll in garnish. Place on cookie sheet & once finished place in freezer if your using within a few hours or leave them in the fridge in air tight container layered & lined with parchment. I would estimate they keep for a few weeks in the fridge but use your own disgression.
20121006-123654.jpg

These bites are packed with MUFA’s from the almonds, lauric acid from the coconut oil, vitamin A & C from the goji berries and antioxidants from cacao!

I use mercola because he cites info from peer reviewed studies.  Now why is it not itializicing here?! Ahh techonology…

Maple Pumpkin Granola, Gf Sugar-Free

I just love catching the first few signs of fall. The chilly nights, leaves starting to change and my favorite comfort foods popping up at farmers markets. Enter pumpkins, apples, squash and why not some fellow regulars like kale and broccoli. But we’re not hear today to talk about anything green. Today it’s all about crunchy, nutty, good for you granola with lots of pumpkin.

20120926-232800.jpg

That’s one thing I particularly love about pumpkin is that under that orange versatile sweetness is actually is a superfood packed with vitamin A fiber and it’s low calories! Not too mention it’s so versatile.

So for whatever reason when I think of fall granola is something that comes to mind and I always prefer to make it since store bought is typically loaded with sugars and preservatives. Plus it couldn’t be cheaper or easier to do!

This recipe is very basic which I’d how I typically make my granola so it is go with most things, but feel free to add walnuts, sunflower seeds, raisins, or even some dark chocolate 😉

Also I never eat Splenda but this is an exception when I use sugar free maple syrup but go ahead and use the real stuff for a true maple flavor.

Ingredients:
3 cups dry rolled oats
1 cup pumpkin purée
1/2 tbsp cinnamon
1 tsp ginger
1/2 tsp nutmeg
1 tsp vanilla extract
1/2 cup sugar free maple syrup, or preferred sweetener

Directions:
Preheat oven to 350 degrees

Mix everything, spread onto tinfoil lined baking sheet- maybe 2
Bake 20 mins or till nice and crunchy

Feel free to add nuts, seeds, raisins or chocolate!

Oh and just wait till I tell you about that green smoothie it’s my new favorite with 1 secret ingredient you won’t believe us delicious until you try it!!

Gluten Free Pumpkin Donuts

20120922-070356.jpg

I know it’s been forever since you’ve heard from me. School has taken all my attention and I’ve been keeping things simple for the most part. I should let you know that last weekend I was really excited to be making my first turkey chili with spicy turkey sausage in a crockpot and you know what happened?

it was awful!!

Apparently I am crockpot challenged and now I think it will stay in hiding forever. Plus it took the fun our of cooking for me. No sautéing, no tasting, no stirring? What’s the fun in that? I have learned my lesson and from now on I will stick with what I know- especially since my vegetarian chili recipe is banging 😉

Lately I have been drooling over all the pumpkin fever going around the blog world right now and I just had to have some. So pumpkin donuts isn’t a bad place to start right? I grabbed the recipe from Purely Twins because I loved how my apple cinnamon donuts turned out using their recipe. The only thing I did differently was add a little vanilla extract and instead of frosting I have been honey obsessed. I also cut the sugar to 1/4 cup because don’t like super sweet treats. So just a drizzle of honey and sprinkle of cinnamon and before I knew it 2 were gone. 😉

So check out Purely Twins Gluten free Pumpkin Donuts for a delicious way to kick off fall!

Farmers Markets Study Break

20120903-210317.jpg

So if you saw my last post it will help make sense of the fact that I haven’t posted in a week. Starting school has definitely been an adjustment but it’s good to be back in a routine and actively working towards a goal. Plus it’s kind of fun making my own lunches for once. And surprisingly enough the BF is enjoying making some of his own too. Probably because it involves more meat and cheese but I do my best to keep it in moderation.

There have also been some other big changes going on- which I have been slightly over the moon about. After going through a bunch of tests it has been clarified that I don’t have a genetic gluten problem but may still have an intolerance. But so far I have been back on all things bouncy, fluffy and yeah just all around junky and it has been amazing. I won’t talk to much about it out of respect for all the celiacs out there but it has really made life easier in certain ways. Especially going back to school.

20120903-211925.jpg

Anyway back to these beautiful finds at the Amish farmers market nearby. This place is great and they have everything! Lots of produce, meats, furniture, cheese, baked goods, gluten free pantry goodies, chocolate, chocolate covered everything, homemade pies, donuts, homemade warm pretzels… It’s really a wonderful way to spend a Saturday morning and the BF loves the HUGE selection of every and any kind of meat, some you didn’t even know existed. I grabbed some lovely red leaf lettuce, bell peppers, lemons, avocados while the BF got some ham and amazing Swiss that is different than we have had before.

20120903-212449.jpg
Oh and then I had to hit trader joes because they have the best price for goat cheese which I was craving and then also found these delicious organic pink lady apples which have gotten me so excited for fall. Something I also scored and has now become my new obsession is sunflower seeds turned butter. I could probably live off of apples and nut/seed butter all season long. I’m totally addicted and it just gets worse every year. And who knew how healthy sun-butter was? Lots of protein, vitamin E, magnesium… And it’s so easy to make, just blend them up! I didn’t even need to add oil but I added a few drops of avocado oil only because I keep my spreads in the fridge (just in case) and I wanted to make sure it would stay really spreadable and it has. Phew!

20120903-213244.jpg
Oh and I forgot to mention these grape tomatoes which I practically devoured as soon as we got home from the market. They were probably the best I’ve had all summer. I really feel like I could never get sick of them and will be sad to see them go.

So I leave you with some yummy finds and no recipe since I haven’t made anything that I feel is worth posting. Don’t worry though I’m thinking of busting out the crockpot soon with the anticipation of fall- too soon maybe? 😉

20120903-214305.jpg

Creamy Corn & Bacon Dip

So it is officially the last weekend of summer for me before all the craziness of school, commuting and all other grown up things begin. I will miss watching a ridiculous amount of daytime television, browsing hundreds of food blogs for hours, and testing out all kinds of elaborate recipes I will no longer have the time to invest in. Simultaneously I am really looking forward to getting back into a routine and actually having a bit more responsibility than figuring out how to DVR my favorite shows to avoid any commercial watching at all. But before all of this happens I need to savor the last bit of summer with a sweet, salty, smokey and undeniably savory dip that I would normally not indulge in.

Enter the Creamy Corn and Bacon Dip

20120825-103634.jpg

I was actually thinking of calling this dip, “Foolproof Way to Hook New Friends” because the bf and I were invited to dinner at our new couple friends house and I of course had to bring something. We have been hanging out fairly frequently and its been great to have made new friends since moving to a new apartment. But I wanted to make sure they really liked us 😉 and what better way to bribe friendship than with food? And when I say food I really mean bacon. I mean come on, who doesn’t like bacon? Even myself although I do eat a lot of vegetarian and vegan meals cannot deny that lingering smokey smell, uniquely crunchy and chewy texture and heavenly salty bite. So when I spotted the original recipe for this in my giant cookbook I knew it was a sure thing. But the recipe seemed rather uninspiring to me as it only called for boiling the corn and throwing it together with ick- cream cheese? I mean I know this is a staple in many easy dips but the sounds of tasting cream cheese with corn and bacon just wasn’t floating my boat. And especially if I am going to have fresh corn there is no question that it is going to be met with butter in a sauté pan- there really is no other way to have it.

20120825-104846.jpg
Plus I wanted to make sure this dip would be something that if I was so inclined to eat a seriously large portion I wouldn’t have the consequences of dairy to deal with. So I thought of what I could sub the cream cheese with that would not be too heavy, economical and have a chameleon like quality about it. Aha! The secret ingredient immediately came to me! And having the satisfaction of watching the bf inhaling this without knowing he is eating _ _ _ _ while I attempt to hide my cheshire cat grin totally confirmed that I indeed would be using this. And let me tell you, even after I told them what they were eating, it didn’t stop them from continuing to scrape the container after dinner. Victorious!

So if you are looking to make new friends or you just want to be the coolest person at a party, do yourself a favor and make this dip.

Ingredients:
3 ears corn
1 shallot, minced
2 garlic cloves, minced
2-3 tbsp real mayo
8 slices favorite bacon
3 tbsp butter
2 tbsp olive oil
2 tbsp chopped fresh chives and bacon bits for garnish

Secret Ingredient:
1/2 package firm tofu, drained

Directions:
-Take out half package of tofu (6-8oz) and drain with paper towel. Squeeze to get as much moisture out as possible.

-Preheat oven to 400 degrees and cook bacon on tinfoil lined baking sheet for about 15 minutes or when it is just starting to crisp up.

-Meanwhile, using a large enough sauté pan on medium heat, add 2 tbsp butter and 2 tbsp olive oil to the pan. Cut your corn off the cob and add to pan. Season generously with good sea salt and pepper.
-Sauté for roughly 3 minutes and then add shallot and garlic and last tbsp of butter and olive oil. You want to caramelize the corn which should take a total of 10-15 minutes of sautéing. Once cooked set aside and bacon should be done around the same time.
-Once they are both cool enough to handle, add your corn to a food processor or blender along with the mayo and blend until creamy. It will still have some texture.
-Next add the tofu (crumble a bit to make it easier for the food processor) and blend until it is mixed throughout.
-Add the slices of bacon which you can either slice or break into pieces with your hand. I chopped it into small bits. Pulse a few times to incorporate the bacon throughout.
-Taste and season according to your taste, I added around 1/2 tsp himalayan salt and few good grinds of black pepper.
-Place in microwave safe to-go container (so you can heat it up at party-better that way) and top with chives and bacon bits.

-Make sure you dress cute and pop a breath mint because you are about to be the life of the party 😉

20120825-111456.jpg

Asian Broccoli and Almond Chicken Salad over Brown Rice

20120820-173200.jpg

Back to school next week and it will indeed be a stress induced apartment here. I will be diving head first into my masters program while the BF starts law school. So I have been trying to plan meals ahead or what is easiest to make because I know I’m not going to want to spend a lot of time in the kitchen. (Well I want to but it’s just not going to happen) And considering I probably won’t have access to a microwave to warm up school lunches, they need to be able to travel and be eaten cold. So does that look like chinese take out? Cuz it’s not!

But the good news is this is just as easy to make and of course a lot healthier! I love being able to satisfy my cravings for salty, greasy junk food without all the consequences that usually come after eating them. This seriously requires no skill or chopping or slicing or dicing. Literally a matter of throwing ingredients in a dish, bake, stir, eat. So you have no excuses! Go make your lunch for the week!

20120820-174346.jpg

Recipe serves 2

Ingredients:
1/4 cup uncooked brown rice
2 chicken breasts with marinade (see below)
2 scallions sliced, green parts only
1/4 cup slivered almonds
1 cup frozen broccoli
-1 tbsp sesame seeds

Directions:

-Cook 1/4 cup brown rice with 1/2 cup water and splash of sesame oil and tamarind paste. Prepare according to directions and check when a little water is done, you may need to add more.
-Meanwhile put your almonds and scallions in a large enough bowl to mix everything.
-Thaw broccoli in microwave for 30 seconds-1 minute and toss in bowl with almonds and scallions.
-When the chicken is finished cooking, allow to cool slightly so you can pull apart pieces with a fork and then throw it in the bowl. Pour the marinade over everything and should help warm the broccoli to completely thaw. (Snag the big pieces of garlic unless you’re a weirdo like me and love eating big pieces of garlic)
-When the brown rice is cooked toss in the bowl and stir everything together. Taste to see if you need any more soy sauce, vinegar…etc. I like lots of black pepper and then finish it with sesame seeds. Bam! Lunch for the week. Or if you have an appetite like me, maybe two days 😉

Ingredients for Chicken Marinade
-2 Chicken Breasts
-2 tbsp tamarind paste
-4 tbsp gluten free soy sauce
-2 tbsp sesame oil
– 1 garlic clove cut in half
-1 tbsp sugar (I use coconut)
-juice of 1 lime
-2 tbsp rice wine vinegar
-1 tbsp fish sauce

Directions:
-preheat oven 350 degrees
I use a glass bread baking dish and stir everything together, coat chicken and throw it in the oven. Check after 5 minutes, flip and check again after five minutes. Should be about done, double check because everyones oven is different.

20120820-175835.jpg

This would be really delicious hot or cold 🙂

Caramelized Shallots, Cheddar, Sweet Potatoes & Kale Bread Pudding

20120816-204535.jpg
Last weekend the Bf and I went to a nearby farmers market and picked up some goodies. Oddly enough I was the one who wanted to go and he came along at the thought that there was a cigar store there (I know, I hate it). Funny thing is, he ended up getting more than me! He left with some local ham, gorgeous loaf of rye bread, cubanelle peppers and shallots. I got a few apples (been craving them for so long!) eggplant and tomatoes. So after 2 days he decided that the bread (that cost almost 5$ which I won’t even spend on a GF loaf for me) is no good anymore. WOAH- not according to me it’s not. So I began to think of how to redeem this loaf of bread he so thoughtlessly took for grantite.

My first thought was meatloaf but I made one not too long ago so I wanted to mix it up, plus it’s not exactly “summer fare”. Then I remembered I have been wanting to experiment with a bread pudding recipe and even more reason to make it because then his lunches for the week are covered! Win win!

So the sad part here is I cannot eat this but you could just as easily make this gluten free, especially if you have a crappy loaf (unfortunately there are many out there) that you don’t want to waste or like me you have failed 5, 6, 7 times, (ok I lost count) at making your own gluten free loaf that you are satisfied with. But thats for a whole nother post.

Now that I knew what I wanted to make I decided I wanted to use up the sweet potatoes that were in my fridge and after some googling I came across this recipe which I slightly modified. I thought I would sneak in the BF’s least favorite veg, kale. It is just so nutritious but I know I can’t force him to eat it. That is unless I smother it in shallots, cheddar and sweet potatoes. Yes I sort of treat this the same as a mom with her picky eaters. Plus it’s another way to nix the meat products without him realizing he’s eating a vegetarian meal 😉

20120816-214140.jpg I’m very very sneaky

Oh and what else is awesome about this recipe? It’s super easy. Maybe 15 minutes of prep AND cooking (not including oven time).

Feel free to trade out the ingredients for your favorite combinations. I’m already thinking of an Indian version of this, like Matar Paneer Bread Pudding- that would be epic. But then should I use naan instead? Hmmm….Like my ultimate comfort foods piled into one dish. Maybe I should wait till summer if officially over before I indulge in the carbs and cream sauces 😉

So go here for the original recipe since my modifications were basically cutting most of the ingredients in half and using a square pan and not a rectangle.

20120816-214933.jpg Maybe because this one kind of a 1 pot wonder, that’s why I found it so difficult to make this look good in photos. But I think you get the picture (no pun intended) that this is gooood or at least thats what he told me. 🙂

20120816-215442.jpg

My First Product Review! Sprouts, and lots of them!

20120814-142601.jpg

I am so excited to be posting about my first product review! And it’s all about sprouts! Not too long ago I had no clue what these odd little things were all about but now I have come to love them! They are one of the best superfoods you can eat since they are packed with vitamins, protein, fiber and super low in calories. Plus there are so many ways you can use them.

After my post on my super detox green smoothie using broccoli sprouts, I was contacted by Life Force Foods Brocco Sprouts to do a product review on their sprouts which I gladly accepted. I still wasn’t really aware of all the health benefits of sprouts until I did some research. Basically, when something is sprouted it activates the enzymes which helps make more of the nutrients more available for you to digest. These are some seriously powerful compounds that have been proven to protect cells are cancer formation and irregular cell growth. Sprouts have great texture for wraps, sandwiches, stir fries, on top of pizza or blended in soups or smoothies. I plan on trying the recipes on their blog too. They have a bunch of different kinds which some I had not even heard of before. I got to try Alfalfa sprouts, Clover Sprouts, Spicy Sprouts, Bean Sprouts, Radish Sprouts, Sandwich Blend, & Chinese Sprouts. I think I might even be forgetting some- there were so many!

I experimented with them in a really rich, chocolately smoothie

20120814-142220.jpg

I used the Alfalfa sprouts and Clover Sprouts and this was soooo good. There was also lots of cocoa powder, avocado, strawberries, blueberries and some maca powder. You can’t help but feel clean after eating this. Ironically the garnish on top looks like sprouts but it is actually shredded coconut and hemp seeds. Just a few health benefits of these sprouts is that they have more chlorophyll than spinach, kale, cabbage or parsley plus they are mostly protein.

One sandwich which I feel I will never tire of in the classic tomato, avocado and sprout sandy. It is so refreshing with lots of textures, I just love it.20120814-154032.jpg
I also have been dying to make spring rolls for myself after buying some wrappers. Mostly because I am all about those dipping sauces and the varying textures that are characteristics of the wraps. I got to try out these bean sprouts which went perfectly. 20120814-152353.jpgI was practically moaning when I was eating them. These rolls have easily become one of my new favorite things to eat and a big reason is because they are so easy to make.

20120814-143247.jpg

I enjoyed the bean sprouts in my Kelp Coconut Pad Thai.  Check out my first ever hacked young coconut.  I know it seems intimidating but its a lot of fun and a wonderful superfood, not to mention they are very versatile.

20120814-145803.jpg

I also wanted to try the spicy sprouts in a type of veggie burger but then I decided to make Spicy Sprout Scallion Pancakes over Brown Rice Pilaf- these were so awesome. I just used the sprouts, psyllium husk powder, some egg and lots of scallions and seasoning.

20120814-150409.jpg It’s a bit hard to tell but there are 3 pancakes stacked on top of each other. You could even use this mixture and pour into mini muffin tin and make a crustless quiche, perfect for work-week lunches.

Lastly I put together a Parsley Pea Shoot Pesto to use with some eggplant and tomatoes I got recently from a local farmers market.

20120814-151530.jpgI think this pesto has superpowers with all of the cleansing abilities in the parsley and sprouts. Did you know pea shoots have 4x more vitamin A than tomatoes, 7x times vitamin C than blueberries and 3 grams of protein per serving? These are just a few of the health benefits, the list goes on and on.

20120814-151825.jpg

Overall I have a new found love for sprouts and I will continue to experiment with them. Look for them in refrigerated section of your grocery store and see for yourself how good they are!

Let me know if you want any of these recipes, I will be glad to share! 🙂

Almond Crusted Chicken over Kelp Noodle Stir Fry

20120808-151840.jpg

So it’s been a looong time since I have wanted some chicken. But lately I have really wanted some chicken nuggets- an old best friend I haven’t seen in a long time. Except I didn’t want that false 30 ingredient stuff that they call food. I wanted some homemade crusty and almondy chicken. And let me tell you it was about as easy it is to go through a drive through.

I have been eating almonds like they are going out of style. I don’t know what has stirred up my craving for them but I think I eat them 1, 2, 3, ok 4 times a day. It doesn’t help that I caved and bought the cocoa dusted kind- they are like crack Well what I presume to know about crack. That is that it is really addicting… you know what I mean.

My other new favorite thing lately are kelp noodles. I have had them for awhile but I actually didnt want to eat them. This is a result of trying shirataki noodles a year ago and not loving them. I did eat them after preparing them but the whole fiber thing did not pan out well for me. Plus dealing with the fishy smell and difficult to chew texture was enough for me to not go back. So when I looked at the kelp noodle texture I was expecting them to be very similar. But after I kept seeing them pop up on other blogs and people raving about them I thought I should at least try them. The verdict–>love love love them! Unlike shirataki noodles you can actually chew them and they have a crunchier texture which I am all about. Plus its great that they are super low in calories and high in vitamins like calcium. And no fishy taste or smell! I picked mine up at Wegmans and got a 1 lb. bag for around $4.30. Not too bad considering a box of gluten free pasta cost about the same or more and delivers less nutrients and more calories. So I call that a win win.

If you can’t tell already I am totally obsessed with Asian flavors, and sweet and spicy things. So to make this recipe even more fool proof I just sautéed some broccoli and julienned carrots with garlic, ginger and some store bought sweet and spicy sauce. Which I totally took credit for when BF said, “Wow I really like the sauce” 😉 I didn’t experiment with having him try my kelp noodles and served his with just the veggies. Although he is a trooper with a lot of my strange food I wasn’t going to risk wasting these.

20120808-153120.jpg They are just too good.

This meal hit my comfort spots on so many levels and was completely guiltless. If you could hear the crunch when I bit into that chicken and to think that this recipe is actually quite slimming because almonds are known as being synonmous as a belly flattening MUFA. (At least in my world 🙂 )

So go spend the 5 minutes it takes to make this and then come back to your computer to thank me 😉

Recipe for 1
Ingredients I didn’t measure anything to give or take, kind of fool proof
1 chicken breast soaked in non-dairy milk for 4 hours or more
1 egg
1/8 cup arrowroot powder/or other gluten free starch for dredging
1/4 cup sliced almonds
handful of gluten free breadcrumbs
2 tsp favorite seasoning blend unless using seasoned breadcrumbs
handful of kelp noodles, (or more!)
1/4 cup sweet onions chopped
1 cup frozen broccoli, thawed
1/2 cup julienned carrots
up to 2 tbsp jarred sweet and spicy sauce
1 garlic clove
1 tsp minced ginger

Directions:
-Soak chicken in almond milk to prevent drying when cooking.
-Remove and shake off excess milk before dredging.
-Preheat oven to 425 degrees and line baking sheet with tin foil (make sure it can handle the heat!)
-Set up dredging bowls and put flour in 1 bowl, scrambled egg in another, and almonds combined with breadcrumbs if using. I crushed up almonds a bit with my hand.
-Coat chicken in flour all over, then move to egg and coat well, then move the almond and crust really well. for that crunch!
-Spray your tin foil and lay chicken directly on, I find this works better than using a cooling rack and I didn’t need to flip but everyones oven is different so take a peek after 5 minutes and make the judgement call.
-My chicken was done in around 15 minutes

For stir fry sauté onions on med high heat. Add broccoli and carrots and cook for 3 minutes. Add garlic and ginger and continue to stir and cook until veggies are cooked, should only take 3-4 minutes. Then I just took off heat and mixed in kelp noodles and the sauce.

Top with chicken and dig in!

And then if your like me and want to completely ruin your healthy dinner, indulge in an entire box of raisnettes because your BF won’t help you eat them and you can’t just use pure will power to stop reaching into that box while watching the new Batman movie because it’s been years since you’ve done that too! 😉

Coconut Mocha Mint Zucchini Muffins

I think it’s that time of year when those who garden are starting to realize, what am I going to do with all of these zucchinis? Now I don’t have a garden but after purchasing 3 zucchinis to make raw wraps my mom brings over a huge zucchini from her garden that I couldn’t turn down. So now with this abundance of green delciousness I am suddenly stumped on how to use them up. Then it occurred to me to start preparing meals/snacks for school (which starts in only 4 weeks- eek)

After researching 100+ recipes with zucchini bread/zucchini muffin/gluten free zucchini bake… I finally came across this recipe which I had to try. I wanted something grab and go, low sugar and that needed a lot of zucchini. This recipe calls for 3 cups and packs that into 24 muffins! Well I tweaked this a bit and made it even healthier but I ended up with 12 large muffins and around 10 mini muffins.

While mixing the ingredients together, I had some Endangered Species dark chocolate mint staring at me saying,

“Why haven’t you eaten me yet?? It’s been almost 5 days and I am only 1/3 gone. Are you ill?”

So then I had a lovely aha moment and thought I will make these chocolate minty flavored. But that still wasn’t enough. Then I glanced over at the coffee machine, fingers crossed and… YES, just a splash of coffee enough to add a mocha essence 😉

So after a splash a coffee, a drop of mint extract and almost an entire bar of mint dark chocolate, I impatiently awaited my timer to go off so I could taste inhale 1, 2, 3 mini muffins

20120805-114144.jpg They had all the coconutty, minty, chocolate flavor I had hoped with little specs of green throughout. I love healthy, sweet treats and they will be perfect for those stressful school mornings, late night study sessions and everything in between! So go grab your overfollowing stock of zucchinis and get baking!

Go here for original recipe:

My Tweaked Version:
1/2 cup coconut flour, may need a bit more depending on water content of zucchinis
1/4 tsp salt
1/2 tsp baking soda
1/2 tsp cinnamon
3 tbsp cocoa powder
4 eggs
1/4 cup coconut oil
2-4 tbsp cold brewed coffee
1/4 cup apple sauce
1/4 cup coconut sugar
3 cups grated zucchini
1 tsp mint extract
1 tsp vanilla extract (we are inseparable)
1 bar mint dark chocolate chopped

Directions: Preheat oven to 350 degrees, grease 2 muffin tins
-Mix all dry ingredients except sugar with whisk to remove any clumps.
-Add eggs one at a time, then sugar and then beat in the rest of ingredients except zucchinis and chocolate.
-Hand stir in zucchini and chocolate. Add coconut flour if it seems too wet.
-Evenly distribute in muffin tins and bake for 20 mins. Allow to cool for 5-10, pop them out and allow to cool completely if you are freezing like me. Otherwise attempt not to gobble up your super low carb, low sugar and still super yummy mint mocha muffin!

These would be a great sneaky snack for picky kids who don’t like their greens!

20120805-120533.jpg

“Oh hey there, moist, chocolate minty delight!” 🙂

My First Foodie Pen-pal!

20120731-174454.jpg

I’m so excited for my first foodie pen pal! Look at all the goodies I got!! Of course there isn’t anything left except for a few cashews (the chocolate was the first to disappear- what a surprise 😉 )

I got these from Dawn, check out her awesome site for your sweet tooth fixings! After telling her I love dark chocolate, anything spicy and ethnic flavored, crunchy and gluten free, she sent me all different things to total satisfy above and beyond. I got to try fantastic spicy jalapeño and cajun chocolate from a little shop nearby her in Alaska (how cool?!?!) which was my favorite. She also sent me some great peppermint like patties with little polar bears on them which I could have eaten 100 of. Cashews that had a peanut thai lime kick with sesame seeds tossed on them, so tasty and I have never had nuts flavored like that before.

Other goodies were some Pink Hawaiian sea salt, a dark chocolate bar with cranberries and almonds and a yummy coconut almond chocolate bar. I got the cutest card with little owls on the front which I just realized I think unconsciously sparked a new owl obsession I have. Check out this adorable decoration I got from homegoods to put on my custom bookshelf

20120731-173233.jpg

Are you totally jealous and want to join in on the fun? Check out this site for all the info and to sign up, its so easy and so fun getting to meet other foodies. I can’t wait for next months and I have already been checking out new fun places to buy nifty snacks!

20120731-174244.jpg

Other than that it has been a really busy day and I think I might be ordering sushi for dinner tonight 🙂

By the way, I am going to tease you and let you know that I am working on a vegan spicy tuna roll and I don’t think I’m too far off from the real thing but I’m still perfecting so you will just have to wait!

Raw Cinnamon Raisin Walnut Buckwheat Bread

20120726-092242.jpg

I’m so excited about this recipe because it is the first raw bread I’ve made in my new food dehydrator. I went back and forth on whether I really needed to invest in one but I just decided it was the best in order to save money in the long run. I originally wanted to buy it for making gluten free breads, wraps and crackers but now I have learned about the importance of soaking nuts and then dehydrating them. It is also awesome for making yogurt which I have also done with Lexie’s Almond & Hemp Yogurt (yum!, see picture below) There are so many awesome things you can do with it I’m still learning and trying lots of new recipes.

I have been craving cinnamon raisin bread for forever and I came across this recipe I adjusted slightly and used roughly 1-2 tbsp honey, slightly less raisins and I subbed some apple sauce because I didn’t have apples. I also added some crushed walnuts because I am obsessed with them right now but I suppose it’s no different from any other time. I laid the batter onto 1 dehydrator sheet and sliced into 4 large pieces.

20120727-075157.jpg

Sorry for the poor quality picture, I didn’t realize it at the time. I used sprouted buckwheat groats with my really high-tech sprouting system 😉

20120727-075310.jpg
For those who don’t know they are lots of benefits to “sprouting” beans, seeds, buckwheat, quinoa…etc. All that you are doing is activating the enzymes within the food and making the nutrients more available. This also increases the protein content and the end result will contain less carbs than if you were to just cook your buckwheat. I sprouted mine for about three days. All you need is to keep it moist but still exposed to air. Typically people use a mason jar with a screen lid but I don’t have one, (obviously)

Check out my little buckwheat sprouts

20120727-075705.jpg Buckwheat sprouts are really versatile and commonly used in raw foods because it is so nutrient dense and despite its name it is gluten free. It’s kinda my new best friend. Check out this site for more details on buckwheat sprouts.

I have enjoyed this bread alone, with tahini, maple syrup and crumbled up in yogurt-amazing.

20120727-075956.jpg

Do you see those crazy carmalized bananas?? This was kind of on accident because I sliced the bananas thicker than you should when dehydrating them and they turned out the same as when you pan fry them in butter and sugar- and it is just pure banana with its natural sugars. Better than candy

20120727-080031.jpg

This has been a really satisfying snack and breakfast. It is filling and doesn’t spike your blood sugar like typical cinnamon raisin treats. If you don’t have a dehydrator I would check out other sites recommendations for baking on low temperatures in your oven.

Click here for original recipe.

Baby Eggplant, Maitake Mushrooms & Forbidden Rice Indi-asian Fusion

20120724-194842.jpg

I love love love forbidden rice. It is not something I frequently see in the grocery store but I can tell you when I spotted it I scooped it up right away. I’m not even a huge rice person but there is something about the flavor and texture. It has this chewiness that other rices don’t have. Maybe thats why the Emperors made it “forbidden” 100 years ago in China. That’s where it gets its name from and they made it off limits to everyone else. They believed it made them especially strong and that it contained exceptional benefits. Well lets just say they were on to something. Forbidden rice is jam packed with anthocynanins which are like super powered antioxidants that are found in all “purple” foods.  It  actually has a deep dark purple color which you see when you cook it.

So I have had this lovely ingredient patiently awaiting in my pantry for its call into a dish and that time finally came after I made a trip to a nearby Asian grocery store. I picked up some Maiktake mushrooms also known as hen of the woods. They are really pretty looking and they have great earthy flavor.

20120724-200545.jpg Just a few health benefits of these mushrooms is that they can boost the immune system, help you lose weight because they are high in fiber and low in calories, anti-cancer properties by activating macrophages which are your “good guys” in your immune system and they can help lower blood sugar levels.  Just to name a few.

When I was thinking of what direction I wanted to go with this dinner I couldn’t decide between Asian or Indian, so I’m sure you can assume what I did. Yup I combined them. I’m not sure this is for everyone because it had a lot of flavor but I really enjoyed it. I wanted to use some Indian spices that I have had and not really cooked with them much. Some cumin seeds, coriander seeds and a few fenugreek seeds. I wanted to use these because they too are packed with nutrients which I was not aware of before I made this. Did you know 1 tbsp of cumin seeds has 22% of your daily iron needs? Fenugreek seeds too have 20% your daily iron needs as well as almost 3 grams of protein and fiber. Together these seeds have been shown to help lower blood pressure, cholesterol, ease digestive problems and help prevent cancer! Who knew these seeds were actually superfoods!

20120724-202544.jpg

So although I wanted to throw all of these into the dish I also have been loving miso paste lately and wanted it to join the party. I consider this to be another superfood because it is alive with good bacteria to help your tummy. It also taste really good. So I wanted to use a smidge of this with a bit of love from tamari and some chili flakes for heat 😉 But really just a smidge.  In case you have never worked with it before just make sure you add it once your food is taken off the heat so not to kill the healthy bacteria.

Ingredients:

-Up to 1 tbs of cumin and coriander seeds

-1/2 tbsp fenugreek (these amounts really depend on your taste)

1/4 cup uncooked forbidden rice

1/4 cup vidalia onion

1 garlic clove

3 maitake mushrooms

1 cup baby eggplant diced

*optional, vegetable stock for healthier stir fry

*optional dinosaur kale leaves chopped

1 tsp miso paste

splash of tamari

sprinkle of chili flakes

Directions:

-Cook forbidden rice according to package

-Once it is almost done, begin toasting your seeds in large enough frying pan over medium heat.  Toast them until it smells fragrant but becareful not to burn.  You may or may not use oil (I don’t).

-Add splash of oil or vegetable stock,  onions, mushrooms and eggplant and saute over medium-high heat for 3 minutes.  Add either another splash of oil or more stock and add your kale and garlic.  Cook until wilted.  Season with tamari and chili flakes.

-Once everything is cooked, remove from heat and stir with rice.  Add miso paste and stir well.

*If you don’t want the whole seeds in your dish, use a coffee grinder after they have been toasted and cooled.  Then sprinkle over the onions when you begin to saute and stir well.

Vegan Spaghetti Squash “Hamburger Helper” tossed in Avocado Mac and Crispy Chickpea Nuggets

Seriously Yum and seriously comforting. I created a new word to help best describe this dish- “carb-tastic” I am not really sure exactly how I got to putting this meal together but I am really happy with what I ended up with. The bonus is that it is pretty much as easy to put together as that funky boxed stuff.

Oh and whats that your asking? Crispy chickpea nuggets?? Yeah I know I’m really excited about it too. It is all thanks to VeganMommy with her chickpea tofu that I am so happy to have found! And it is SO easy to make and cheap!

20120724-102617.jpg Since me and soy are not friends so its a bit of a bummer that I can’t enjoy tofu especially since I actually like it. Not that I think all vegetarians or vegans need to eat it to be healthy at all but there are so many cool things you can make with it like dips, scrambles, desserts… which have been off limits to me until now. I am thinking up a lot of cool ways to try this out but I really just wanted to crisp it up for this dish to mix up the textures.

20120724-092449.jpg

For the “hamburger” part I used my go to millet-mushroom combo and just crumbled it all over. It’s my favorite ground meat substitute and obviously much healthier. Although this is very comforting it is packed with vegetables, vitamins, minerals, fiber and protein. I don’t think it gets much better than that.

Oh and what do you think of my DIY food board?

20120724-103654.jpg I’m taking baby steps to upping my photography because I know I am not interested in making dishes I see unless it comes with a great picture. I have been wanting to do this for awhile because it is so easy and really makes a difference in how your photos look. I just love turquoise and now I want to paint everything in this color 😉 I am trying to think of a good color to paint the other side to really utilize it the best I can. I would love a bright yellow but I’m not sure how that would contrast with a lot of food, any thoughts?

Look how much the yogurt parfait pops against the blue background

20120724-104819.jpg I still have a long way to go, but it makes taking pictures with my iPhone more fun, hehe 🙂

For the rest of the dish I used an archived favorite, Avocado Mac & Cheese but I added some scallions, chives and roasted garlic (obsessed). I nixed the goat cheese and used lots of herbs de provence, love that stuff

This recipe comes together really fast ones the spaghetti squash is finished roasting. A recommendation for those somewhat intimidated vegetables like the winter squashes, beets, root vegetables… that seem to require a lot of time are really made so much easier if you roast them soon after buying and then just throw them into the fridge so they are ready whenever.

Ingredients:
-Prepare the chickpea tofu unless you can have regular. (If you are like me and not a huge fan of chickpea flour this is not the same and I don’t find it to have that overpowering taste)

-1/2 small spaghetti squash
-1/2 shallot minced
-3 garlic cloves
-handful of grape tomatoes
-handful of zucchini chopped
-1/4 cup tofu chopped

Directions:
-Preheat oven to 375 and roast the spaghetti squash for at least 30 minutes until it pulls apart easily with a fork.
-Wrap the garlic cloves in tin foil and place on baking sheet to steam and sweeten them. Also throw chopped tofu on with light cooking spray and season to taste.
-While that is in the oven sauté the shallots, grape tomatoes and zucchini for 5-7 minutes till cooked.
-Grab your magic bullet or food processor and blend your Avocado Mac (recipe above)
-Once the squash is done and cooled enough to handle, scoop out the inside with a fork. Blend your steamed garlic with avocado mac and mix with spaghetti squash to coat. Stir the sautéed vegetables and go to your happy guilt-free carb place 🙂

20120724-110135.jpg
Crispy, crunchy, creamy, meaty, savory, deliciousness!

Vegetarian Grape Tomato, Green Pea & Parmesan Spaghetti Pie

20120717-122743.jpg

Don’t you hate when you realize you didn’t need to boil off an entire box of pasta for one person? Now there is a ton of cold, plain spaghetti in your fridge and you have lost any desire to make it magical. Enter the spaghetti pie which is so easy its ridiculous and so delicious its comforting. Plus this is easily made gluten free with your favorite gluten free spaghetti or in the past I have used spaghetti squash which is more “bikini friendly” being the time of year it is.

With dishes like this they are so easy for packing work lunches (plus you get to look like martha stewart 😉 ), I literally cut it into four slices and put each in their own to go for BF to take to work. Bam no more thinking about what to make for the rest of the week! Or if you don’t want to commit to just one flavor of this you could either put different ingredients on one half of the pan or pour just the “base” (see below) into large muffin rounds and then put different ingredients in them like sliced carrots and mushrooms or eggplant and roasted peppers, get creative!

This recipe uses eggs but you could just as easily use an egg replacer for a vegan version and daiya for cheese topping. This is so easy and so affordable to make, I plan on using it often for a quick fix lunch or dinner.

Ingredients:

-Around 2 cups cooked spaghetti or spaghetti squash

-1 cup green peas, thawed slightly

-1 cup sliced grape tomatoes

-2 garlic cloves minced

-1 half vidalia onion chopped

-3 eggs

-around 1/4 milk or preferred non-dairy, unsweetened

-small handful chopped fresh parsley

-1/4-1/2 cup parmesan cheese

Directions:

-Preheat oven to 375

-On medium heat saute onions until transuclent.

-Add peas, garlic, and grape tomatoes. Let the garlic saute for two minutes and then add the spaghetti. Depending on how sticky it is you may need to add some oil or you could toss it very quickly in some boiling water to loosen just becareful not to overcook.

-Meanwhile beat eggs with milk and season with salt and pepper.

-Once the peas are tender but not mushy and tomatoes are slightly wilted take off heat, add parsley and pour into round baking dish or muffin molds if using different ingredients. I used 9 inch glass dish. Spread evenly and top with milk mixture.

-Bake for about 15-20 minutes, (start checking after 15) and once it looks like it is almost done top with parmesan cheese and seasoned breadcrumbs (I was out of them) and continue to bake another 3-5 minutes until cheese is melted.

20120717-122820.jpg

Super Detox Green Smoothie with Chai Spiced Buckwheat Groats

20120717-094416.jpg

So two days ago I deviated from my usual diet- big time. And I have been paying the price ever since. I have stated before that I am not a vegan or even strict vegetarian although I mostly eat that way. I haven’t even had chicken in a few months only because I just don’t have a taste for it. Plus I think my body doesn’t handle a lot of protein well. Unfortunately lately I have been really tired because I haven’t been planning my meals right and believe my iron was really low. So I went to the store and got myself some grassed beef to make a burger. This was also my first time having grassed beef and I must say it was really delicious. And although I don’t regret eating it as a word of caution to others in my position, except to be out of commission the next 24 hours. Sorry if thats TMI.

Day two I am feeling more like a human again and I obviously wanted something nutritious and detoxifying so a green smoothie seemed the obvious choice. Plus I have been wanting to try buckwheat groats for awhile and I finally picked some up yesterday. I soaked them in water overnight and after finding ground cardamom for a really good price I had to make a chai spice. This was freaking fantastic on top of the smoothie and really makes it feel like a substantial meal because of all the chewing. Plus the spices have their own abundance of nutrients like iron, calcium, potassium, chromium and lots of others.

Parsley, aka only the most common garnish used is only just recently making an appearance in my kitchen. I’m not sure why I just don’t love it as much as most whereas cilantro, mint, chives, Thai basil… I am obsessed with. Parsley has been used for hundreds of years as a detoxifying ingredient. It is high in vitamin K, C, and A as well as lutein and Zeaxanthin which are antioxidants that help fight degeneration of the eye as well as plaque build up in the arteries.

The other ingredients somewhat speak for themselves as far as health qualities go. Overall this smoothie is really high in vitamins, minerals, protein, fiber iron and calciumand also low in calories. It is definitely bitter so sweeten it to taste. You could add a handful of mint leaves but I refrained because I wasn’t sure how that would pair with the chai buckwheat. This has become my new favorite green smoothie but feel free to alter to your preference!

Ingredients:
3 cups spring mix
1 stalk celery
3 dinosaur kale leaves, stems removed
1 large or 2 small frozen beets (I love to add them instead of ice cubes)
1 cup broccoli sprouts
1 cup parsley (great time to use those stems!)
Water and ice for desired consistency
1 tsp cinnamon
Sweetener, stevia dropper to taste or try a frozen banana for more decadent breakfast

Blend everything and sweeten to taste
-Add ins I forgot but I will add next time is 1 tsp spirulina and 1 tsp matcha green tea powder.

Buckwheat Groats:
-Soak 1/8 cup buckwheat groats overnight. Rinse well and pat dry. Warm 1 tsp coconut oil in a pan and add groats. Use premade chai spice (if not high in sugar) or add pinch of ground ginger, cardamom, cinnamon and optional cloves. I also grated some allspice. Toast On medium heat until there is no liquid or moisture. These have a firm bite and chewing well is a must for good digestion!

Buckwheat is a great source of iron and gluten free whole grain shown to help balance blood sugar and lower blood pressure.

20120717-094521.jpg

240 calories in entire recipe
14g fiber
40g carbs
5g fat
16g protein
7g sugar

60% of daily iron needs
50% daily calcium needs
weeks worth of vitamin A, C, and K 😉

And tomorrow there is some super easy and delicious vegetarian comfort food and its super affordable too!

Kitchen Therapy

So it’s been awhile since I’ve posted, but it’s only because I’m finally starting my summer. My neuroscience class ended and I finally feel like a person again. And although I haven’t posted I have been cooking- a lot.

Say hello to my little celebratory pineapple-mango guava rum delite to kickoff my summer- and maybe it was 12pm in the afternoon after my neuro final 😉20120713-095128.jpg

On fourth of July I had to have my meaty mushroom millet burger which I decided to have some spicy sweet potato fries and my favorite summertime snack- tomatoes I know weird right? I probably go through a container of grape tomatoes every three days and having lots of fresh basil growing outside doesn’t hurt.

20120713-094330.jpg
Oh and that cheese there, is Daiya, and it’s AMAZING! Seriously you have to try it if you are curious it is SO worth it and yes it is a bit pricy at 3-4$ a bag, but just once I encourage you to splurge. And don’t worry it is very melty, it just doesn’t look like it because I was doing 1,000 things in the kitchen and didn’t time it right.

I also made some Apple Cinnamon Goji Berry Granola with Toasted Coconut- needless to say this has been a huge hit and is almost gone.

20120713-095902.jpg

Some super satisfying vegan and gluten free comfort food, aka Three Pepper Loaded Pizza on Polenta Pizza Crust (half has Daiya and the other half has shredded Mexican cheese with dairy)

20120713-100234.jpg

20120713-100300.jpg

I finally made Tahini with raw sesame seeds that I roasted myself- if you decide to do this don’t leave the kitchen! Those babies can burn quick and you don’t want to have to throw it out. Oh and did I mention- it is SO good! I will never buy store bought again, and why should I when a bag of sesame seeds cost 2.50$ a pound where a 10oz jar can be at least around 6$?

20120713-103533.jpg

And a whole bunch of other things

20120713-103801.jpg

Front Right: Pumpkin Seed Butter with Cinnamon and Honey
Middle: Sweet & Spicy Curried Lentil Hummus
Back Left: Green Cabbage Kimchi
Back Right: Dye free, preservative free Pickled Ginger

And of course one would think that I should be satisfied by this abundance of food.  Whereas I am refraining daily from buying an ice cream maker because I know the damage that could be done ;).  But on those hot summer nights where nothing feels better and all I want to do is drive literally 2 miles to the soft-serve, gluten free, 8 calories an 1oz! speciality store where I can have cookies and cream which is practically taboo in the gluten free world.  Yes it really is only 8 calories an ounce, and it is really freaking good and I don’t know how they do it.

So I hope you are enjoying your summer as much as I am enjoying mine, now its off to reading in the sunshine!

(If anyone wants recipes for anything let me know and I will share 🙂 )

Brown rice and Bell Pepper Collard Wraps with Basil Lime Dressing

20120703-193812.jpg

Collard wraps have become one of my favorite ways to eat lately. Thats of course only after you figure out that you can’t over stuff them so they can be wrapped properly. And surprisingly 1 leaf produces 2 very substantial sized wraps. Initially for this dish I was not planning to wrap it up (thats what she said ;)) and I was just going to eat it is a pilaf but then I was craving a basil-y lime sauce and then I had a lightbulb moment. I am so glad I did because this was SO GOOD! I know it’s so simple but it was SO satisfying and trust me I never thought I would say that about something wrapped in “lettuce”.

Other than cooking the rice (which involves little-no skill) this meal can easily be prepared in under 20 minutes. It is also very versatile so mix and match your favorite flavors. Mine was vegan but the BF did without the lettuce (go figure 😉 ) and sautéed some of the jalapeño chicken sausage to add in. These wraps can also travel fairly well and can make a great lunch, just keep the sauce on the side and make sure you wrap them well.

20120703-200049.jpg

Sorry I know my pictures aren’t the best- I’m always rushing as the BF sits there waiting to eat as I am attempting to take 30+ photos.

Ingredients:
1 cup brown rice, uncooked

1/2 onion of choice
1 red bell pepper
1 green bell pepper
2 garlic cloves
2 ears of corn

Directions
-Cook brown rice according to directions. Try to have this ready for when the vegetables are ready you can just mix everything together.

-Heat skillet over medium-high heat, add oil/butter and sauté onions and corn for 2 minutes. Add chopped bell peppers and sauté for 3-5 minutes until they start to soften. Add garlic and saute for 3 minutes or until everything is evenly cooked. Season with salt and pepper. Other optional seasoning could be chipotle, paprika and cayenne. I kept it simple because I was all about the sweet lime basal dressing.

Sweet Lime Basil Dressing:
2-3 tbsp avocado
1 tsp nutritional yeast
2 drops stevia, or more to taste
1/2 lime juiced
1 tbsp vegan sour cream
1/4 cup lightly packed fresh basil
water to thin to desired consistency

I threw everything in magic bullet

20120703-203403.jpg
To assemble:
Take 1 large collard leaf and cut of the rib so you have 2 wraps. Spread dressing in a line down the center and then lay the brown rice mixture on top. I have found the easiest way to wrap is fold the rib cut side over to make a base which holds the bottom in place. Then just start at 1 end and roll while continuing to hold the bottom piece in place. It takes a bit of practice and still can get a bit messy while you eat it but thats the fun part 😉

This recipe could serve 4 but since I’m feeding a hefty man appetite it was more like 2.5 hehe 🙂

Curried Tahini Banana Crepes, GF

20120627-203736.jpg

What? You actually came to read about this? Were you grossed out or intrigued? Well either way I’m here to tell you these were DELICIOUS! What an awesome way to start my morning with a lovely sweet and warm comforting plate of gluten free crepes. The flavors of the tahini go perfect with the banana and the curry was a great way to wake up my taste buds (did I mention it wasn’t even 6am yet?) As long as your curry powder isn’t crazy spicy this will totally work. I used the one that I made from scratch but store bought ones will work perfect because they are very mild.

These are totally flour free and is a base of 1 egg, some flax and baking powder. Talk about a super healthy way to start your morning so that drizzle of agave or honey is not such a big deal 😉

I encourage you to try these to mix it up and even if your not a huge curry fan, a sweeter version may turn you onto it. If your crazy and really don’t care for it, sub in chai spice or just some cinnamon.

Ingredients:
1 egg
1 tbsp flax seed
almond milk, start with 3 tbsp
1 tsp baking powder
1 tsp curry powder (I use 1 heaping tbsp 🙂 )
1/2 ripe banana
1 tbsp tahini

1 tsp vanilla extract

dehydrated banana (oh yes I did finally get a dehydrator, lots to come with that)
1 tsp coconut oil
honey or agave for drizzling

Directions:
-Mash your banana in a bowl. Add egg and vanilla extract and  scramble together to thin out banana even more. Add flax and almond milk to create pancake/crepe consistency. Add curry powder, baking powder and tahini and stir well. You don’t want the batter too thin or too thick.
-Heat 1 tsp coconut oil or just spray frying pan and pour 1/3 batter into the pan. Roll the pan around quickly to dispense batter evenly. Cook around 1 minute and flip and cook about 30 seconds. Crepes are finicky so just look for the edges to start to lift and little bubbles in the middle which are good signs it is ready to be flipped.
-Top with dehydrated banana slices, agave even some walnuts wouldn’t hurt. Get creative!

20120627-203755.jpg

Butternut Squash, Broccoli & Shiitake Stir Fry

20120627-194321.jpg

Sometimes I find myself just craving the most random things. Today it happened to be broccoli. I know weird right? I wanted to dump the whole frozen bag to be defrosted but I refrained to only about 1/2 ;). I think these odd cravings are maybe the body’s way of saying I need these nutrients. Although when my body says banana, peanut butter and chocolate what is it looking for…hmm

Some other finds I had in my fridge was some pre-chopped butternut squash from Trader Joes. I never buy fruits or vegetables that aren’t in the whole form but for the price of around 2$ for 1lb. and the grunt work is done for me (cutting butternut squash is meant for iron men) why not? So I roasted it all yesterday which was so convenient and put it back in the fridge for times like this. I’ve been implementing some more carbs into my diet because I think my energy has been low and I don’t often eat grains because I never feel like cooking them. (I know silly right?) I have also been looking at my diet and thought my iron is most likely low due to eating mostly plant foods and not eating “smart” but I plan to do a post soon so check it out for some energy boosting tips!

Another TJ’s find I had was shiitake mushrooms. This actually led me to researching them because I don’t know much about them and since they’re asian mushrooms I knew they most likely had some great health benefits. Did you know there has been extensive research on them proving to have benefits towards your heart, lowering your cancer risk and improving your immune system? Plus they’re high in B vitamins, fiber, zinc, copper…not a bad gig for a delicious low calorie food huh?

So to continue the asian love I flavored with some classic ginger, garlic, tamari and sesame oil. Some sweet chili sauce, flakes and sesame seeds made it perfect! So satisfying and comforting without weighing you down, in only 15 minutes!

Ingredients:
5 shiitake mushrooms, sliced
1 cup cooked butternut squash
1/4 cup sweet onion
up to 1 tbsp sesame oil
1 tbsp tamari
1 tbsp rice vinegar
1 cup broccoli (or more 🙂 ) I always use frozen
1-2 garlic cloves
1-2 tsp fresh ginger root grated
1 carrot peeled like linguine
2 scallions sliced thin, green parts

Directions:
-Heat sesame oil over medium-high heat. Add onion and broccoli and sauce 3 minutes. Add mushrooms, tamari and rice vinegar and saute 2 minutes. Add garlic and ginger and saute for 2 minutes (don’t walk away, you don’t want garlic to burn). Add carrot and butternut squash so everything is hot and mingling. Take off heat and stir in scallions and top with sweet chili sauce and sesame seeds.

20120627-200756.jpg

Skinny Shepard’s Pie, 2 Ways

20120623-081507.jpg

Shepard’s pie is not something I think I have ever eaten before let alone made. But for fathers day (yes I know a little late) I was having my parents and I wanted to make something that would satisfy the dad and still be easy to prepare. Whenever I have guests I try to think of recipes that will not require me to be in the kitchen so I can spend time with everyone relatively uniterrupted. This recipe is perfect which is also why I love putting dishes in ramekins because it not only adds to presentation but makes the cooking process a breeze!

Now although I am not a “vegan” most of the time I choose to eat vegan because I do prefer it- but I am just not one to commit to an extreme. But for awhile now I have lost any craving for meat and I knew that I would want my Shepard’s pie to be meatless. So I made this 2 ways, 1 Vegan (except for butter) and 1 with beef. Personally, I thought mine was wayyy better and more flavorful 🙂

It may sound like a lot of work but it only adds another 7-10 minutes because I made mine first. I used my favorite meat sub in, some finely crumbled mushrooms sauteed. They add such a savory, meaty flavor I can never get enough. Oh and I haven’t even mentioned the skinny mashed potato part. Here is sneaky secret–it’s cauliflower!. Yeah and it taste just as amazing. I added a bit of dijon mustard (something I used to despise) for a tangy kick. Overall this recipe was a huge hit and is definitely going to become a new staple. Plus it doesn’t hurt that the ingredients are super cheap!

20120623-084230.jpg

Vegan in front, beef only next and pancetta and beef in the back

Ingredients:
1 lb. ground beef, your preference
1 medium onion, chopped
1/2 of 1 shallot
4 garlic cloves, minced
1 cup peas-thawed
1 cup carrots, diced the same size
1/2 cup mushrooms minced in food processor to “meal like” consistency
1 head cauliflower
1 tbsp dijon mustard
1 tbsp butter, divided
white wine
up to 1/2 cup non-dairy milk
optional add-in, 1 container pancetta (from trader joes)

Directions:
Preheat oven to 375 degrees

Chop cauliflower and lay on tin foil lined baking sheet. Spray with canola spray, salt and pepper. Roast till tender, around 20 minutes. Turn once halfway through

To make Vegan Shepards Pie:
-Finely minced mushrooms in food processor.
-Add 1/2 tbsp butter to at least 1 inch deep sauté pan and sauté shallots for 2 minutes. Add 1/4 cup carrots if they are raw, saute for 2 minutes.
-Add mushrooms, reserved butter and 1 garlic clove and sauté for 1 minute. Add a splash of white wine for acidity and continue to sauté till it cooks off. Add peas, turn off heat and stir everything together really well.
-Pour into ramekin, set aside

To make beef Shepard’s Pie:
-If using pancetta, pan fry till cooked, roughly 5 minutes, and set aside.
-Using same pan (make sure it is big enough) add 3/4 of package of beef and cook until it is almost cooked completely through or cook completely, pour onto separate plate, set aside.
-Add onion and carrots and sauté for 3 minutes. Add garlic and saute another 2 minutes until carrots are tender. Add peas and pancetta if using. Season well with salt and pepper. Divide between 3 ramekins

To make mashed cauliflower:
Add 2 garlic cloves to blender (I used vita-mix) and mince. Add cauliflower and season with salt, pepper and dijon mustard. Thin out with unsweetened non-dairy milk. If your sneaky like me add some nutritional yeast 😉 Divide among all ramekins.

Put in fridge until ready to cook. Take out 20 minutes before you bake them to bring to room temperature. Preheat oven to 375 and put ramekins on baking sheet, bake for 15-20 minutes until they are nice and hot.

Devour!

20120623-094452.jpg

Spicy Cubanelle Cucumber Gazpacho

20120621-185853.jpg

So I know this isn’t the prettiest of Gazpachos but it’s SO delicious and refreshing- especially with the crazy hot weather happening. The best part about Gazpachos is they are super easy to make, naturally very healthy and still fill you up! I decided to put this together because I was craving some fresh in season veggies like tomatoes and cucumbers and with the weather leaving me feeling very dehydrated it seemed like the perfect meal! I added some diced watermelon for even more hydration and to balance the spiciness.

The end result was perfect and turned out better than I expected. I’m wondering why I haven’t done this before but now it will definitely become a staple for the rest of summer. This recipe is jam packed with vitamins, minerals, fiber, and flavor! And for those that are like me and need a bit of crunch, throw in some sprouts and crackers (I love these raw ones :))

Ingredients: feel free to swap your favorites
1/2 cup grape tomatoes
1 cucumber
1/2 cup watermelon or omit and just add water to thin as needed
1 garlic clove (you might want to try half and work up-I love garlic)
1/8 cup diced onion
1 celery stick
1/8 cup cubanelle pepper (de-seeded)
2 tbsp chopped cilantro
1 scallion, green part
Juice if 1 lime
Lots of fresh cracked pepper
(I also snuck in some matcha green tea powder :))

Directions:
Blend it, taste it, season and eat up! Or is it drink?

Garnish ideas:
1/4 cup diced watermelon
1/4 cup sprouts
Few raw chips
Salsa

For sure crunch add some finely minced

Ok time for a random question. I am considering buying a food dehydrator so I can make my own chips, wraps (gluten free wraps don’t come easy!) and all the other fun goodies possible. So to those of you who have one, how do you like it and is there anything specific I need to look for? Any suggestions would be awesome!

Ridiculously Amazing Brownie Batter Bowl

20120616-131622.jpg

I know it’s been awhile since I’ve come up with something amazing, but I think I may have just redeemed myself. This bowl of BEANLESS brownie batter goodness is so ridiculously, sinfully and effortlessly satisfying, you might need to pinch yourself after you taste it. That’s because it’s not even 150 calories, has only healthy MUFAs and is nut/dairy/soy/sugar free. And not that I have anything against bean dips, I actually really enjoy it but they usually require dates which are high in sugar.

The funny thing about this little concoction is that I made it on accident. A few nights ago I had planned to have some cold cocoa so I stirred together some flax milk and cocoa powder. Then I thought maybe I’ll make a chia pudding since I’m putting it in the fridge for an hour-ish. So I threw in some chia meal, (I prefer that to seeds right now) and I didn’t feel like dirtying my magic bullet cup so I just left everything all chunky in the cup as anyone who has tried to stir cocoa powder into something cold knows. Then when I came back and opened it up I realized something spectacular happened

I made healthy brownie batter!!

One of my favorite things to eat as a child, I easily preferred the batter to the brownie, (well I wouldn’t pass one up if it came my way…) and now it seems perfectly off limits seeing all the sugar, carbs…etc. I really can’t even describe to you how similar this is to the real thing and how bad it feels 😉

I don’t remember where along the way some coconut flour entered the picture, I think I just stirred it in after but now I do it before to make for a “firmer” batter. Plus then you get a bite of “cookie dough” type texture.

This is so easy to make, and requires very little ingredients so I don’t want any excuses.

Ingredients:
1 cup unsweetened flax/almond/coconut milk
3 tbsp cocoa powder (I prefer dark)
1/2 tbsp chia meal
1-2 tbsp coconut flour, more will give you thicker batter
Sweetener to taste, I used 5 stevia drops

Directions:
Mix your dry ingredients in cup or bowl you plan to eat out of (dish smart). Add your milk and sweetener and stir. If you want thick batter stir less and use 2 max coconut flour. Allow it to chill in the fridge at least 15 minutes and 2 hours for very thick batter. It will firm up especially on the top so just stir and add any additional toppings you want! I plan to get some sprinkles and I’m sure some peanut butter sauce will find its way on there at some point!
20120616-134103.jpg

I may have added some coffee powder to it today- needless to say it was the best mocha pick me up ever!

Chickpea, Cucumber and Fennel Salad with Tahini Dressing

20120612-205420.jpg

It’s funny how taste change over time. I can remember just last year absolutely hating the taste of fennel. I wouldn’t even try something if it had a trace of fennel in it. Then recently I was eating a salad and suddenly I thought, “I think I just ate a piece of fennel- and I liked it. And then I went back for more salad just so I could believe what my tastebuds were telling me 😉

A few weeks later I found myself craving the flavor of it in some kind of fresh salad with seasonal ingredients. Behold my cucumber, tomato, chickpea and fennel salad. It practically makes itself and you just stand there and watch. Until you pour the dressing on it and then it is gone before you know it.
This has made for a really delicious lunch for me and the BF (surprisingly). Right after I made it he tried it, and then he ate a bowl of it (guess I’m making more for his lunch…) For him I actually split up what the original made and used half for mine with chickpeas and half for him with pasta. Worked out great and I will definitely make this again, especially with the craving for lighter meals with hotter weather.

Ingredients:
1 can chickpeas
1 fennel bulb
1 long english cucumber
cumin and coriander
1-2 tomatoes
lemon
pasta for non-gluten free version

Directions:
If you are splitting to make half gluten free and half pasta salad for others then boil off half a box of pasta.
Rinse and drain 1 can chickpeas
Chop fennel and cucumber to roughly the same size. Chop tomato taking out the seeds. Mix together and add a bit of acidity, lemon juice, white vinegar or apple cider vinegar. Set aside. Make dressing.

Dressing:
1/4 cup + 1 or 2 tbsp tahini
1/4 cup water or unsweetened dairy milk (less for thicker dressing)
2 tsp (or more if you want spicier) dijon mustard
juice of 1 lemon
dash of agave (optional)
lots of pepper and sprinkle of salt

If splitting, separate the cucumber mixture. First do the non-gluten free version so you don’t accidentally use the same utensils..etc. Add the chickpeas to half the mixture, then add half the dressing. Sprinkle with cumin and coriander. Season to taste. Chill for minimum 2 hours

Do the same with pasta version.

On the mornings that I brought this to work I quickly added some sliced avocado which went perfectly 🙂

Coconut Cookie Dough with Tahini & Blueberries

20120610-095514.jpg

If there is one food that I always want but never make for myself, it’s cookie dough. Usually because recipes calls for dates or other high sugar items and I know how blah I feel after eating them. Well my most recent and most aha moment obsession is coconut cookie dough- and it’s practically instant. Plus it is crazy filling so you really can’t overdose on it. We have the coconut flour to thank for that. It is super high in fiber and basically sugar free even though it has some natural sweetness. What an amazing food.

Another great thing it is great for is making crack cookies. Not that I am guilty of making them lately to stay alive during school or anything. If you don’t remember crack cookies then you need to take a stroll down memory lane. Or is it an alley? 😉

This breakfast takes as long as it takes you to stir. Yeah it’s pretty freaking awesome. I have been making it in the mornings when I don’t have time to do anything. Then I just bring my cup with me and eat it on the way to school. I was craving tahini too this time when I had it and it went perfectly with it, but feel free to make your own variations-it doesn’t discriminate. I would have totally put chocolate chips in this but I ate them all. Instead I threw some blueberries on top since these lovely fellas are finally coming back into season. Also a little sprinkle of hemp seeds for a dash of protein makes for a super charged breakfast!

Ingredients:
2 tbsp coconut flour
1/4 cup non-dairy milk (I used flax milk)
3-4 drops liquid stevia, to taste
1 heaping tbsp tahini
1/4 cup blueberries
1/2 tbsp hemp seeds

Directions:
Stir together the non-dairy milk and coconut flour. Coconut flour sucks up a ton of moisture so you may need more milk depending on your preferred consistency. Stir everything but the blueberries really well. Chill if you have the time and patience- I didn’t.

Oh and make sure you have a nice big drink because this stuff is high in fiber and you don’t want it to get backed up 😉

Zucchini Fettucine, Collard Greens & Sweet Potato in Curry Cream Sauce

20120604-224852.jpg

After a super long day of commuting and 6 hours of neuroscience I am not wanting to spend a lot of time cooking dinner. I also don’t want to call this “curry in a hurry” but that is what it is. It was the perfect way to unwind and to enjoy my new patio space in peace. Plus the weather today was a bit cooler so this was the perfect bowl of comfort.

For a long time I have been wanting to grind my own curry powder and the other night I finally did. I got the recipe from another blogger and unfortunately I can’t find the original. There are so many to choose from that if you are an Indian food lover like me I encourage you to choose one and make it from scratch. It is so easy and I’m sure more economical not to mention it really does taste better. I used my coffee grinder but I imagine you could do it in any high powered blender. I used a heaping tablespoon for just myself but that is because I love love love curry.

This dish would be perfect with a piece of naan and if you are not gluten free you can easily find it in the grocery store near the bread aisle. If you are I have seen gluten free recipes although I haven’t tried one. For us gf-ers I think roti would be easier to prepare because it is pretty quick. Or a chickpea crepe would make a delicious addition.

I had neither so I actually added a little potato starch to thicken up the sauce because I really didn’t want any to be left behind 🙂

The homemade version I used is slightly bitter because it has a good amount of turmeric so I added a little honey at the end- perfection. Sweet, spicy, savory and comforting equals one happy chica!

Ingredients: Serves 1
1/2 small sweet potato spiraled, or chopped
1/2 zucchini spiraled with ribbon/fettucine setting, or just use a peeler
1/2 cup chopped, stems removed collard greens
1/4 cup white onion
1-2 garlic cloves
1-2 tsp fresh ginger
1 tsp homemade curry powder for non-curry lovers, 1 tbsp for curry lovers 😉
1/4 cup non-dairy milk
honey/agave to taste
optional add-ins- cashews, toasted almonds, coconut milk…etc.

Directions:
Heat 2 inch high non-stick pan with 1 tbsp oil/ghee and cook onions for 2 minutes. Add sweet potatoes and cook another 1-2 minutes till starting to soften. Sprinkle curry powder and coat evenly. Add collard greens, season with salt and pepper and cook another minute till just starting to wilt. Use microplane and grate ginger and garlic and sauté for 1 minute. Add non-dairy milk and stir everything together.

Depending on how saucy you want it either cook it down and add zucchini 2 minutes before you take it off the heat. I wanted it to be a thick sauce so I added the zucchini soon after, tossed everything very well and then took it off the heat. About 2 minutes later I added some potato starch, stirred well and poured into a bowl. Then I finished it with about 1 tbsp honey.

Although this is one of the easiest curries I’ve made, it’s one of my favorites because of the homemade curry powder, it makes it 🙂

Avocado Mac & Cheese

20120525-220519.jpg

A few weeks ago I saw a post on avocado Mac and cheese and I wanted to eat my computer screen. My obsession with avocado never ceases to amaze me, I really never get sick of them. I would much rather OD {over dose ;)} on a “fatty” avocado than a fatty burger. Plus they can be transformed into anything. That is why I loved the idea of making them into a Mac and cheeseee, yum.

Oddly enough when I was craving this I was also wanting some nutty mushrooms and eggplant that was just chilling (no pun intended 😉 ) in the fridge. So before I made the sauce (which only takes a minute, really) I sautéed some leeks with sliced mushrooms and diced eggplant. The combination of the nutty, earthy mushrooms with the leeks and richness of avocado- heaven. I enjoyed this bowl of comfort sitting in silence as boyfriend was napping after we had returned from going out to lunch. Yes you heard me correctly, we had just got back from lunch except there was a bit of an issue.

You see we had just gotten back into town after visiting my school and after I read yelp reviews of about 30 different restaurants I had decided we go to this Thai-Malaysian restaurant. I attempted to order the vegetarian Thai curry and continued even after I asked if there was soy sauce. (it’s a sneaky gluten carrier.) I ordered anyway because usually in curries it is only in small amounts and I was expecting a coconut milk style dish. When our food arrived my stomach dropped. It was like they took a cup of oil and a cup of soy sauce and drenched the vegetables. Even if i could have soy I would still not eat that- it looked like some of the greasiest “Chinese food” I had ever seen.

After that I was not a happy camper and bf gave me some of his but at this point I just wanted to go home and make myself something I know I would like. Then I proceeded to break down because of the stress I feel in general now of eating out and how I have to make sure what I am eating is safe. Not only do I not want to be that person with a list of criteria but the worst of it is when people judge you about it. As if it is a choice or that it is for some vanity. So right now I still struggle to enjoy eating out because of the worry of whether or not they can or care to accommodate my needs.

Have any of you gluten free-ers, dairy-free, vegan…etc ever been in this situation? How do you handle it. Feel free to share your tips on the stresses of eating out with allergies.

So with this lengthy story I give you an extremely satisfying, gluten free and optional vegan avocado Mac and cheese.

Ingredients for sauce: makes 1 serving
1/2 small avocado
2 tbsp nutritional yeast
5 basil leaves
2 tbsp fresh lemon juice
1 garlic clove
1/4 cup unsweetened non-dairy milk (I used flax milk-my new favorite love)
Sprinkle of herbs de Provence
*optional 1 tbsp goat cheese

Directions:
Place garlic clove in food processor to mince. Add the rest of ingredients till you get a smooth consistency. Use more or less milk for desired thickness.

For sautéed veg:
1/4 cup each eggplant diced, mushrooms sliced, leeks sliced

Mince roughly 1/4 cup leeks and sauté them over medium-high heat for two minutes. Add the eggplant (I used a non-stick pan because eggplant is like a sponge and sprayed the pan a few times with non-stick spray to brown eggplant.) Add the mushrooms during last two minutes of browning the eggplant.

20120525-224527.jpg

I then used spiraled zucchini only because I was impatient and didn’t feel like bowling my quinoa pasta. Next time I will be waiting though. Either way it was amazing. Next time I might add seem toasted slivered almonds to up the nuttiness factor.

Just toss everything together and season with salt and pepper to taste.

20120525-224932.jpg

Raw Fruity Pebbles

20120523-102248.jpg

Now, here me out on this one. I know it’s going to sound crazy once you see the ingredients list, but it’s one of those don’t knock it till you try it. Especially if you are a person like me and like things with texture and lots of crunch, with a tad of sweetness 😉

I have seen variations of this popping up here and there and I just had to try it. It is basically like a “pulsed” smoothie instead of blended which I am really enjoying- mostly because its forcing me to enjoy it hehe. There is a lot of chewing going on here. And I know your thinking this can’t possibly be satisfying. Well I wouldn’t post something that I am not proud of or didn’t think tasted good-really good.

If you are brave and try this I would love to know what you think. All of the colors and super sweetness from the apple and stevia made me think of that old classic known as fruity pebbles. Needless to say this is way healthier, and I think way more satisfying. Plus there’s no sugar crash and you actually feel amazing after you eat it.

20120524-143651.jpg

Ingredients:
1/2 cup frozen broccoli
1/4 cup frozen blueberries
1/2 organic apple- {I love Fuji}
1-2 organic carrots
*optional- cauliflower
1/2 cup carton coconut milk
1 tsp cinnamon
3 or more drops liquid vanilla stevia

Directions:
Using a food processor pulse fruits and veggies to get small couscous bites. Depending on the size of your ingredients you may want to pulse the larger items first and then add in the small.

Add cinnamon and stevia and mix in food processor. Pour into a bowl and add coconut milk- this is what makes it for me.

I then pulsed 1/8 cup almonds to get similar couscous bites and sprinkled on top for even more crunch and protein.

I promise it’s amazing and I actually look forward to having it in the morning. 🙂

Carrot Chia Breakfast Pudding

20120520-092242.jpg

With the warm weather here I have been wanting something refreshing and cool to start my mornings. My crazy mornings that is. I have moved to a new amazing apartment (see the mess in the background- still a work in progress) I could not be happier but now I am just trying to find a new routine and keep organizing things. Of course that involves remembering where you put them in the first place so I’m working on that first. Unfortunately my computer has officially died and I am posting my from iPad which I might actually prefer at this point. It takes better pictures than my old digital right?

Anyway, I will be trying to get more posts in now that I am a bit more settled although life will not be slowing down. This breakfast has been perfect for mornings that you just don’t have time to make anything and it still is a nutritional powerhouse of nutrients. 3 minutes max is all you need and I cant imagine you need much more time to drink it too 😉

Ingredients:
About 10 baby carrots
1 tbsp chia meal (I make one cup batch to always have on hand, see in photo)
1 cup almond or other non-dairy milk
5 ice cubes
Few drops of stevia to taste or 1 date
1/2 tsp cinnamon
1/4 tsp ground ginger

Directions:
Blend and guzzle 🙂
I topped with some grated carrot and coconut for texture. Some walnuts don’t hurt either, talk about an omega packed breakfast!

20120521-084420.jpg

Cilantro Chickpea Crackers & Easy Tomato Chutney GF

Sorry it has been so long since my last post.  Life is going 1,000,000 miles an hour with lots of change in the air.  New school, new home and new work- all in less than 1 months time.  So needless to say I have not stopped cooking but it’s having the time to post them.  In addition, my computer is on the brink and I think it has officially died.  Oh how timing is everything.

The gluten free saga continues on but today with great success in my first cracker recipe.  I have been trying to come up with convienent “carb” type snacks so I can easily grab something before I head to a long day of school. {which starts in only two weeks!}

Yesterday I woke up fairly early, around 6:30 and before I knew it I had found a cracker recipe that I thought I would attempt.  I have always thought it looked like such a lengthy process and been turned off by the idea.  But I have a lot of cilantro to use up and I hate spending $4 or more dollars on a small bag of gluten free chips that I would prefer not contain tons of soy products. {I have noticed that I have a bad reaction to soy and I am avoiding it}

So here are my lovely chickpea crackers

Usually I do not like the taste of chickpea flour in baked goods but for some reason it really worked here.  Perhaps it is the Indian spices that covered it up, although they still had a “neutral” flavor.  The only part I will advise you about is “kneading” and “rolling”. Flour your hands, the batter issuper sticky.  But don’t worry that problem is easily fixed with some sorghum flour lightly coating your hands and the rolling mat.

You can find the original recipe here.  The only thing I did not use is the methi powder.  It has a bitter taste and I don’t care for it so I just omitted it.  I also under cooked them slightly so they are a bit softer instead of super crunchy.  I really loved the result.

I also made an AMAZING tomato chutney- seriously I don’t think I can not have this is my fridge, I plan to make a huge batch after trying it out yesterday.  It is crazy good.

I used 5 vine ripened tomatoes and omitted the cornstarch.  Check out the recipe here

This was so good I wanted to eat it with a spoon.  At 7 in the morning.  Is there something wrong with that? 😉

This would be very convienent for a quick to prepare appetizers or snack for last minute guest.  Plus it is very budget friendly.

Blueberry Buckwheat Donut Flop

Unfortunately for me, looks can be deceiving.

This was supposed to be a post to support celiac awareness month.  Although it still is somewhat, it is also one for all the other gluten free bakers out there who feel my pain- a gummy result yick!

Needless to say I was really disappointed after having this recipe bookmarked for 2 months.  I finally thought I had all the ingredients and decided last night at 9:00pm would be a good time to make these.  Ah I think it was my flax eggs that took me down in the end.  Although it could have been the banana for the sugar and the tapioca flour instead of arrowroot flour- shucks.

So even though I failed at my blueberry buckwheat donuts {I will still be eating them} I wanted to post them for everyone to follow the Original recipe.  The trials and tribulations of gluten free baking is always a temperamental thing but hopefully soon I can redeem myself and try these again!

Super Crunchy Banana Peanut Butter Granola

I am slightly obsessed with crunchy things.

I am also obsessed with all things peanut butter, which I am actually trying to kick because of the dangerous mold aflatoxin that grows like wildflower on peanuts. (corn too) Like any addiction it is not an easy one to just stop cold turkey.  Plus I probably didn’t make it any easier by making this fabulous granola.

It is chunky and nutty and ridiculously easy to make.  It is the perfect topping on everything.  This is also “sugar free” except for the banana and also fat free because I used peanut flour which helps sneak in some protein.  Basically this is the perfect granola, so go make it now.

Ingredients:

2 cups rolled oats

1/4 peanut flour or PB2 prepared

1 banana

1/2 cup water

up to 1/4 cup sugar free maple syrup- depending on your taste

2 tsp cinnamon

*optional add ins, 1/4 cup raisins, 1/4 cup sunflower seeds, 1/4 cup dark chocolate chips

Directions:

-Preheat oven to 350 degrees

– Blend everything but the oats.  Toss mixture and the oats.  Lay on baking sheet- don’t spread it thin leave it chunky for the super crunch factor.

-Bake 15-20 minutes till just starting to brown- make sure to turn it at least once.

Big crunchy nutty balls 😉 — “that’s what she said“.  Sorry I just had to- he’s my idol.

Apple Cinnamon Donuts with Coconut Almond Glaze, GF, Vegan

Donuts.  Not something I get to have everyday- or anyday if it is from any local store.  This is because there is no such thing as a gluten free donut at the common chains.  It is such a shame because they are ridiculously easy to make and they are many variations.

These beauties barely took 40 minutes from mixing to tasting.  Ok it was more from mixing to divide and conquer.  For being my first attempt, I wasn’t disappointed.  They turned out super sweet like you want your donuts, {but how there is only 1.5g sugar in each donut?}  Well I did a little cheating and used a sugar alcohol called Erythritol.  Sugar alcohols occur naturally in plants and fruits so they are nothing to be afraid of.  Erythritol is similar to commonly seen Xylitol but it doesn’t have the digestion side effects that sometimes come with it.  It has practically no calories and personally I find that it doesn’t actually stimulate my sweet tooth the way splenda can.   It also doesn’t contribute to tooth decay.

These donuts are more dense than your typical donut and feel slightly more like a muffin.  I like this though because it slows you down as you eat it and makes you enjoy it more.  Then the glaze makes it all that much more amazing.  It has a bit of a crystallized bite which makes it really feel bad– I might have just broken down and eaten one…. yummm 🙂

Oh and of course these make a perfectly healthy breakfast.  They are 200 calories a pop with the frosting with only 1.5g sugar- does that even count?  Plus they have a whopping 10g of fiber making quite a filling compact breakfast on the go.   Who would have thought you can lose weight when eating donuts for breakfast? 😉  They also have some protein and iron for those vegetarians and vegans!

Investing the $10 in a donut pan was probably the best decision I have made in awhile.  After making these and loving the result, I don’t think there will come a time when I won’t have donuts on the table!  They are way too easy to make, taste way to good, and don’t come with grief!

Ingredientsrecipe adapted from Pure 2 Raw

2 tbsp coconut flour

1 cup gluten free flour blend (see recipe below)

2.5 tsp baking powder

2 tbsp flax meal

1/3 cup erythritol

1/2 cup apple sauce

2 tsp cinnamon

*optional few sprinkles of allspice

1/2 cup coconut milk mixed with 1 tbsp apple cider vinegar for 10 mins

3 tbsp coconut oil

-Mix dry then add wet.  Place evenly in donut pan (I use 6 hole) and bake on 350 for 15-20 minutes.

Gluten Free Flour Blend:

1 cup sorghum

1 cup tapioca starch

1/2 cup buckwheat flour

1 tsp xanthum gum

Coconut Almond Glaze:

Take 1 tbsp coconut almond butter (or make your own in magic bullet with 1 tbsp coconut flakes with 1/8 cup almonds)  and mix with 2 tbsp (or more needed to make good consistency) almond or coconut milk and 2 tbsp erythritol.  Warm slightly in the microwave to dissolve the sugar.  Pour on donuts once they are cool.


Nutrition Facts & add 18 calories for frosting per donut

Dark Cocoa Hazelnut Brownies with Peanut Butter Chips, GF

Brownies.  Dark Cocoa Brownies.  That are Nutty and Sweet and Coconutty and a smidge of Peanut Butter.  Can you think of a better brownie?  Oh and maybe they are under 100 calories a pop?  Oh yeah I did.  Actually she did originally {her website is amazing!!!}, and I made a few tiny changes.

And I might have had this for breakfast.

Ok maybe 2.

With a banana.

And just a splash of maple syrup.

Yeah that’s what I call good pre-workout food. 😉

These are so fast to prepare and the result is divine. It is not often at all I make brownies- especially since going gluten free, but these might be happening more often.  They don’t have added refine sugar, just honey and the chips.  They are perfectly fudgey and dense the way a brownie should be, with just a bit of delicacy from the hazelnut meal, but not crumbly.   And then there is those wonderful peanut butter chips that deliver you to heaven.  These are the perfect way to satisfy your sweet tooth without busting any seams 😉

Adapted from The Spunky Coconut

Ingredients:

1 cup hazlenut meal

3 tbsp coconut flour

1/8 cup cocoa powder

1/8 cup dark cocoa powder

1/4 cup honey

1/4 tsp salt

1/2 tsp baking soda

1/2 tsp baking powder

1/8 tsp xanthum gum mixed well with 1/2 + 2 tbsp water

1/4 cup reeses peanut butter baking chips

Directions:

Mix xanthum gum and water well (I did in magic bullet)

Mix dry ingredients well-no chunks.  Add the wet.  Pour into 8×8 pan, bake 25-30 mins on 325 degrees.  Try not to eat the whole thing 😉

Nutrition Information

Oh and I have to tell you because I am so super excited, I just bought one Klean Kanteen to bring some Crazy Green Smoothies and other yummy things with my on my travels to school- these things sound amazing!!  They are not aluminium or plastic and they are BPA free!  I even found a coupon code HCHW20DWV and got 5$ off!  The reviews on this says that it really keeps things cold for 24 hours!!  I’ll let you know what I think after I do a trial run 🙂Product Preview

Craziest, Greenest Green Monster Ever!

This has been my breakfast for 2 weeks straight now.  Maybe 1 or 2 times I have strayed- but not willingly.  I guess I’m addicted, but it’s green so it’s ok right? 😉

And there’s some lovely toppings that basically make the drink.  Some molasses coated sunflower seed granola, hemp seeds and spirutein protein powder.  I have never been a fan of protein powder until this one, it’s amazing.  It doesn’t have fillers, chemicals or all those other unpronounceable foods that most powders do.  Plus it has every vitamin and mineral your body could ever need.  But the best part is that it makes your drinks like a milkshake  consistency SO GOOD!  I have the double fudge crunch version and I didn’t realize till about half of it was gone that it recommended that it just be stirred in to keep the “crunch” factor.  Once I did this is reminded me of when I was little and used to love the swiss miss hot cocoa packets because I used to just pour it onto water and then eat the powder- (weird I know). But it was sugary and good and the protein powder totally resembles it.

Anyway, back to green monster madness.  This is like vitamin A, C, E, D, K,….. {you get the point} to like the 10th power.  You are getting it from the obvious green food sources but then the powder helps supplement even more.  Plus there are some other goodies like hemp, flax and avocado which help with absorbing all those fat soluble vitamins.  And of course you know I’m going to add matcha green tea powder to my green madness.

What you don’t know are my other crazy ingredients.  Just a warning though- don’t go overboard on them like I did a few days ago.  Too much of anything can make you ill- like nauseous, dizzy and shit I might pass out from too much cayenne, rosemary, mint, and turmeric in my smoothie – whoops!

So yes, I did put too much of those into it but now I realize I can do UP TO 1 tsp of each except the cayenne :)- really only do a pinch!  If you are looking for a way to mix up your green monsters I definitily encourage you to try this one with the added spices for extra anti-inflammatory and antioxidant benefits.

And I know the ingredients list is somewhat off putting but you must try this-it’s amazing!  You would never expect it to taste good but trust me I wouldn’t post anything that is not super delicious 🙂

Ingredients: Serves 1–{Recommend organic for as much as possible}

2 sticks celery

1 cup chopped kale

1 persian cucumber or 1/2 regular

1/2 cup baby carrots

2 sheets nori

1 tsp matcha green tea powder

1/2 cup almond milk

4 ice cubes

1/2 cup water

1 cup frozen broccoli

2 tbsp avocado

few tsp mint extract, or fresh mint

2 tbsp sugar free chocolate syrup

.5 tsp turmeric

1 tsp cinnamon

sprinkle of cayenne

1 tbsp fresh minced ginger

1 scoop spirutein (or other preferred)

1-2 tbsp flax seed

1 tbsp hemp seeds

2 tbsp granola

Directions:

Blend everything except the last 4 ingredients which go on top to be mixed in.  Enjoy and feel invigorated!

This is packed  with tons of healthy vitamins and minerals- check it out!